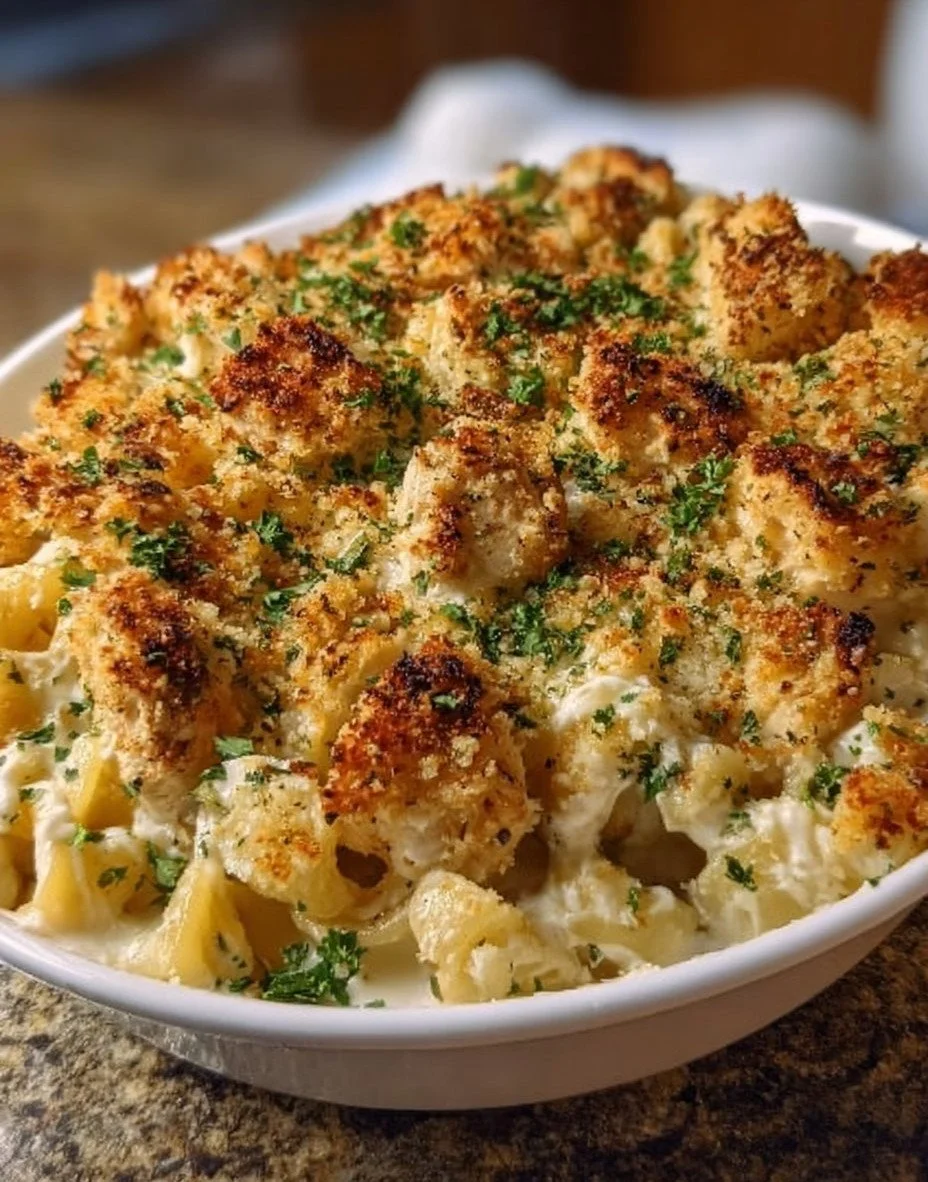
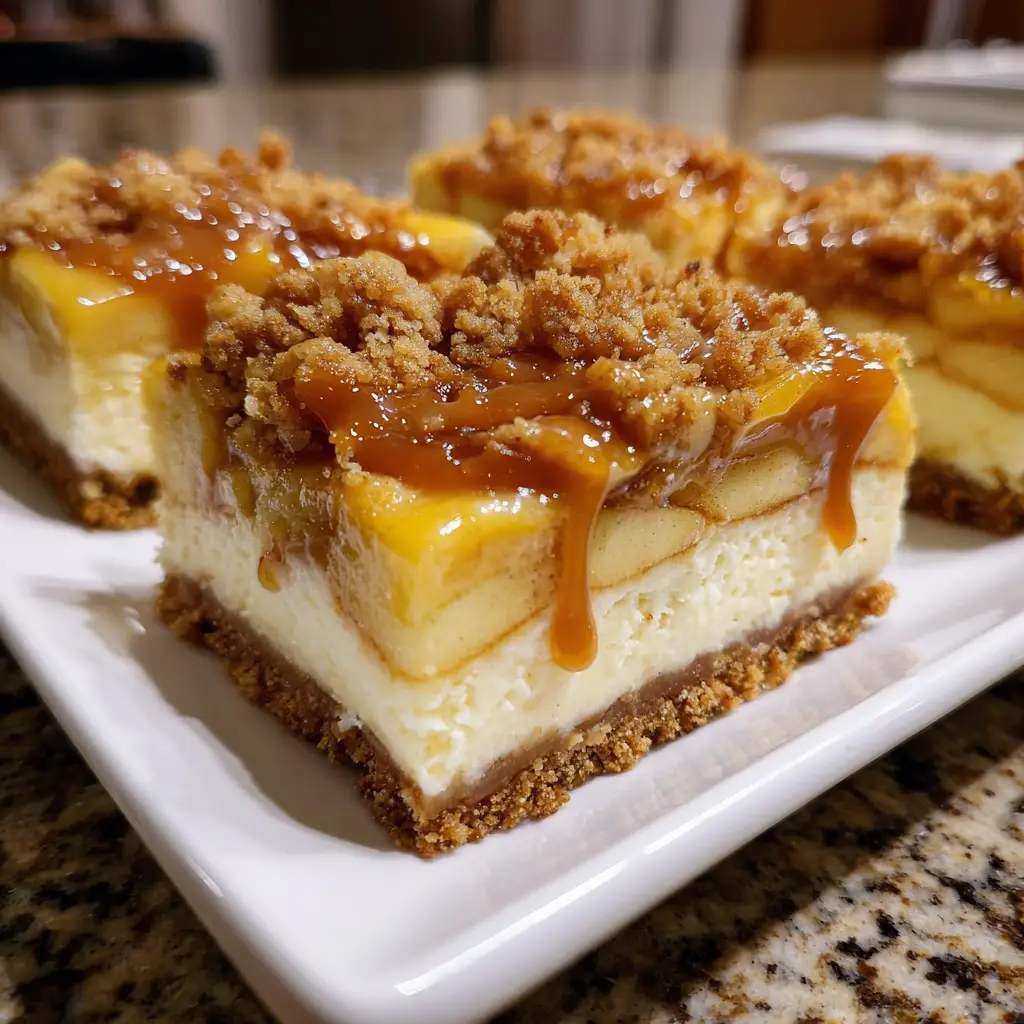
Introduction to Caramel Apple Cheesecake Bars
Imagine, if you will, the quintessential flavors of a crisp autumn day captured in a single, sublime dessert. The Caramel Apple Cheesecake Bar is precisely that, a masterful culinary creation that marries the nostalgic, homey comfort of a caramel apple with the rich, sophisticated elegance of a New York-style cheesecake, all in a convenient, handheld bar form. This dessert is a symphony of textures and tastes: a buttery, shortbread-like crust provides a sturdy, crumbly foundation for a layer of velvety, tangy cream cheese filling, which is then adorned with a spiced apple pie-style topping and finished with a decadent drizzle of glossy caramel.
Why Is This Caramel Apple Cheesecake Bars So Popular?
The popularity of Caramel Apple Cheesecake Bars is a direct result of their genius fusion of universally beloved dessert genres. They tap into the powerful nostalgia of fall fairs and caramel apples, while simultaneously satisfying the deep-seated craving for creamy, luxurious cheesecake. Their format as a “bar” is another key to their widespread appeal; they are infinitely more portable and shareable than a whole cheesecake, making them the ideal dessert for potlucks, parties, picnics, and gift-giving. They eliminate the fuss of slicing a delicate cheesecake, offering pre-portioned perfection.
Furthermore, they are a visually stunning dessert. The layers are beautiful when viewed from the side, and the glossy caramel drizzle against the pale cheesecake and spiced apples is irresistibly photogenic, making them a social media darling. They also offer a delightful textural contrast that a standalone cheesecake or a plain caramel apple cannot achieve alone. The combination of the crisp crust, the smooth filling, the tender apples, and the gooey caramel creates a multi-sensory eating experience that keeps people coming back for more. They feel indulgent and special, transforming simple, familiar ingredients into something truly extraordinary.
Why You’ll Love This Caramel Apple Cheesecake Bars:
- The Perfect Flavor Fusion: You get the best of all worlds: the tangy richness of cheesecake, the warm, spiced comfort of apple pie, and the sweet, buttery bliss of caramel.
- Ideal Texture in Every Bite: From the crisp crust to the creamy filling and tender apples, the textural experience is complex and deeply satisfying.
- No-Fuss, No-Crack Cheesecake: The bar format is forgiving. There’s no need for a water bath, and since the cheesecake layer is thinner, it bakes evenly and is far less prone to the cracking that can plague full-sized cheesecakes.
- Make-Ahead Marvel: These bars need time to chill and set, making them the perfect dessert to prepare a day or even two in advance, freeing up your time on the day you plan to serve them.
- Crowd-Pleasing Excellence: It is nearly impossible to find someone who doesn’t love this combination of flavors. They are a guaranteed hit with guests of all ages.
Here’s what you’ll need:
For the Crust:
- 2 cups all-purpose flour
- ½ cup granulated sugar
- ½ teaspoon salt
- ¾ cup (1 ½ sticks) unsalted butter, cold and cut into small cubes
- 1 teaspoon vanilla extract
For the Cheesecake Filling:
- 2 (8-ounce) blocks full-fat cream cheese, softened to room temperature
- ½ cup granulated sugar
- 2 large eggs, at room temperature
- 1 teaspoon pure vanilla extract
- 1 tablespoon all-purpose flour
- 1 tablespoon fresh lemon juice
For the Apple Topping:
- 3 medium-sized tart apples (such as Granny Smith, Honeycrisp, or Braeburn), peeled, cored, and diced into ½-inch pieces
- 2 tablespoons unsalted butter
- 2 tablespoons light brown sugar, packed
- 1 teaspoon ground cinnamon
- ¼ teaspoon ground nutmeg
- 1 tablespoon all-purpose flour
- 1 teaspoon fresh lemon juice
For the Garnish & Finish:
- ½ cup caramel sauce or topping, plus more for drizzling
- ½ cup chopped pecans or walnuts, toasted (optional)

How to Make Caramel Apple Cheesecake Bars:
Now that you have your ingredients ready, let’s dive into the steps for making this delightful Caramel Apple Cheesecake Bars. It’s as easy as pie, and I promise you’ll feel like a culinary superstar!
Step 1: Prepare the Crust
Preheat your oven to 350°F (175°C). Line a 9×13 inch baking pan with parchment paper, leaving an overhang on two sides for easy removal. In a food processor, pulse the 2 cups of flour, ½ cup of granulated sugar, and salt until combined. Add the cold, cubed butter and vanilla extract. Pulse until the mixture resembles coarse, damp sand and starts to clump together. Alternatively, you can use a pastry cutter or two forks in a bowl. Press this mixture firmly and evenly into the bottom of the prepared pan. Bake for 18-20 minutes, or until the edges are lightly golden. Remove from the oven and let it cool slightly while you prepare the filling. Leave the oven on.
Step 2: Make the Spiced Apple Topping
While the crust is baking, prepare the apples. In a medium skillet over medium heat, melt the 2 tablespoons of butter. Add the diced apples, brown sugar, cinnamon, and nutmeg. Cook, stirring occasionally, for 6-8 minutes, until the apples have softened slightly but still hold their shape. They should be tender-crisp, not mushy. Sprinkle the 1 tablespoon of flour over the apples and stir to coat, cooking for one more minute. This will help thicken any juices. Remove from heat and stir in the teaspoon of lemon juice. Set aside to cool.
Step 3: Create the Cheesecake Filling
In a large bowl, using a hand mixer or a stand mixer fitted with the paddle attachment, beat the softened cream cheese and ½ cup of granulated sugar on medium speed until the mixture is completely smooth, creamy, and free of lumps. Scrape down the bowl. Add the room-temperature eggs one at a time, beating well after each addition until just incorporated. Mix in the vanilla extract, 1 tablespoon of flour, and the tablespoon of lemon juice. Beat on low until the mixture is uniform. Do not overmix once the eggs are in.
Step 4: Assemble the Layers
Pour the smooth cheesecake filling over the warm, pre-baked crust, spreading it into an even layer. Dollop the slightly cooled spiced apple mixture evenly over the top of the cheesecake layer. Use a spoon to gently swirl the apples into the cheesecake batter, just slightly—you want distinct layers, not a fully mixed one. Drizzle the ½ cup of caramel sauce over the apple layer.
Step 5: The Final Bake
Place the pan in the preheated 350°F (175°C) oven. Bake for 30-35 minutes, or until the edges of the cheesecake are set and puffed, and the center only has a slight jiggle when you gently shake the pan. The apples on top will be tender.
Step 6: The Crucial Cooling Process
Remove the pan from the oven and place it on a wire rack to cool to room temperature. This gradual cooling is essential for preventing cracks. Once at room temperature, transfer the pan to the refrigerator to chill for at least 4 hours, but preferably overnight. This allows the cheesecake layer to fully set, making the bars firm enough to slice cleanly.
Step 7: Slice, Garnish, and Serve
Using the parchment paper overhang, carefully lift the entire block of bars out of the pan and onto a cutting board. Use a sharp knife, wiped clean between cuts for neat slices, to cut into squares or bars. Just before serving, drizzle each bar with additional caramel sauce and sprinkle with toasted chopped pecans, if using.
Tips for Success:
- Room Temperature is Key: Ensuring your cream cheese and eggs are at room temperature is non-negotiable. This prevents a lumpy filling and allows for a smoother, creamier texture.
- Don’t Overbake the Cheesecake: The center should still have a slight jiggle when you take it out. The residual heat will continue to cook it as it cools.
- Use Tart Apples: Granny Smith apples are ideal because their tartness provides a beautiful contrast to the sweet cheesecake and caramel, preventing the dessert from being cloying.
- Chill Thoroughly: Patience is a virtue with these bars. Rushing the chilling process will result in a messy, gooey slice. Overnight chilling yields the cleanest cuts.
- Toast Your Nuts: Toasting the pecans or walnuts in a dry skillet for a few minutes before garnishing enhances their flavor and adds a wonderful crunch.
Equipment Needed:
- 9×13 inch Baking Pan
- Parchment Paper
- Food Processor or Pastry Cutter
- Stand Mixer or Hand Mixer
- Medium Skillet
- Mixing Bowls
- Spatula
- Sharp Knife
Variations of Caramel Apple Cheesecake Bars:
- Streusel-Topped Bars: For a crumbly top, omit the caramel drizzle before baking and instead, top with a streusel made from ½ cup flour, ¼ cup brown sugar, ¼ cup cold butter, and ½ tsp cinnamon. Bake as directed.
- Salted Caramel Twist: Use a high-quality salted caramel sauce and finish the bars with an extra sprinkle of flaky sea salt for a gourmet sweet-and-salty profile.
- Pear-Ginger Variation: Substitute the apples with diced, firm Bosc pears and add 1 teaspoon of finely grated fresh ginger to the pear sauté mixture.
- Oatmeal Cookie Crust: Replace the shortbread crust with a crust made from blended oatmeal cookies for a different flavor dimension.
- Gluten-Free Option: Use a 1-to-1 gluten-free all-purpose flour blend for both the crust and the tablespoon of flour in the cheesecake filling.
Serving Suggestions for Caramel Apple Cheesecake Bars:
- A La Mode Excellence: Serve a bar slightly warmed or at room temperature with a scoop of high-quality vanilla bean ice cream. The contrast of temperatures is divine.
- With a Hot Beverage: A cup of strong coffee, a black tea, or a chai latte makes for a perfect pairing, cutting through the sweetness beautifully.
- Dessert Charcuterie: Include these bars on a fall-themed dessert board with other treats like mini pumpkin muffins, shortbread cookies, and chocolate-dipped fruits.
- Gifted in a Box: These bars package and travel wonderfully, making them a much-appreciated homemade gift during the holiday season.
Prep Time:
30 minutes
Cooking Time:
55 minutes (including crust bake time)
Total Time:
1 hour 25 minutes (plus minimum 4 hours chilling time)
Nutritional Information:
(Per bar, estimated, based on 16 bars)
Calories: ~320
Protein: 4g
Sodium: 180mg
Sugar: 25g
Fat: 18g
Carbohydrates: 36g
Fiber: 1g
FAQs about Caramel Apple Cheesecake Bars:
Q: Can I use canned apple pie filling?
A: You can, but the result will be different and often much sweeter and softer. For the best texture and flavor control, making the simple apple topping from scratch is highly recommended. If using canned, drain it well and skip the cooking step; just sprinkle with a little flour and cinnamon before adding.
Q: How do I store these bars?
A: Store them in an airtight container in the refrigerator for up to 5 days. Wait to add the final caramel drizzle and nuts until just before serving to maintain the best texture.
Q: Can I freeze Caramel Apple Cheesecake Bars?
A: Yes, they freeze very well. Freeze the bars (without the final garnish) on a parchment-lined baking sheet until solid, then transfer to a freezer-safe container or bag for up to 3 months. Thaw overnight in the refrigerator before garnishing and serving.
Q: My cheesecake layer puffed up and cracked. What happened?
A: This is usually caused by overmixing the batter after the eggs are added, which incorporates too much air, or from a sudden temperature change. Mixing on low speed once eggs are added and allowing the bars to cool gradually at room temperature before refrigerating will prevent this.
Q: Why is my crust crumbly and hard to slice?
A: You may have overworked the crust or used too much butter. Ensure you are pressing it firmly into the pan. If it’s still too crumbly, adding another tablespoon of melted butter to the crust mixture before pressing can help bind it.
Final Thoughts:
The Caramel Apple Cheesecake Bar is a dessert that transcends seasons, though it sings the song of autumn with particular grace. It is a testament to the magic that happens when classic comfort foods are reimagined with a touch of elegance and convenience. This recipe delivers a sophisticated, multi-layered dessert experience without the intimidation factor of a traditional cheesecake, making it an achievable masterpiece for bakers of all skill levels.


")