Introduction to Butterfinger Pie
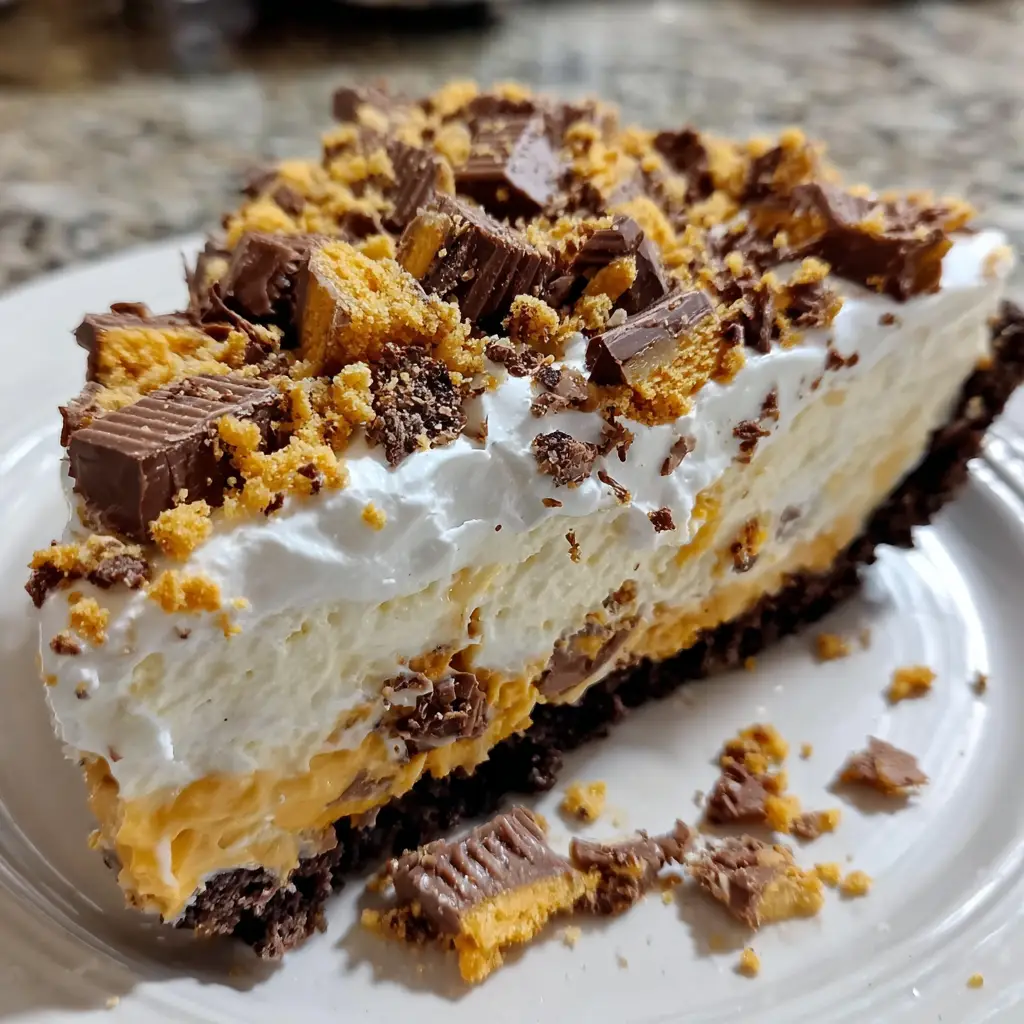
Hey there, fellow dessert lovers! If you’re anything like me, you know that life can get pretty hectic. Between juggling work, family, and everything in between, finding time to whip up a delicious treat can feel impossible. That’s where this Butterfinger Pie comes in! It’s a no-bake wonder that combines creamy peanut butter and chocolate flavors, topped with crunchy Butterfinger goodness. Perfect for impressing your loved ones or simply treating yourself after a long day, this pie is a quick solution that will have everyone asking for seconds!
Why You’ll Love This Butterfinger Pie
This Butterfinger Pie is a dream come true for busy moms and professionals alike. It’s incredibly easy to make, taking just 15 minutes of prep time. Plus, it requires no baking, which means less mess and more time to relax. The combination of creamy peanut butter and crunchy Butterfinger pieces creates a flavor explosion that’s simply irresistible. Trust me, this dessert will quickly become a family favorite!
Ingredients for Butterfinger Pie
Let’s gather our ingredients for this delightful Butterfinger Pie! Each component plays a crucial role in creating that creamy, crunchy masterpiece. Here’s what you’ll need:
- Pre-made graham cracker crust: This saves time and adds a sweet, crunchy base. You can find it in the baking aisle of your grocery store.
- Creamy peanut butter: The star of the show! It gives the pie its rich flavor. If you prefer a bit of texture, feel free to use crunchy peanut butter instead.
- Powdered sugar: This sweetens the filling and helps achieve that smooth consistency. It dissolves easily, making it perfect for no-bake recipes.
- Whipped topping: This adds lightness and creaminess to the pie. You can use store-bought or make your own if you’re feeling adventurous!
- Butterfinger candy bars: The crunchy topping that brings everything together! You can crush them yourself or buy pre-crushed for convenience.
- Chocolate syrup: A drizzle of this sweet goodness on top adds an extra layer of flavor. You can use store-bought or make your own for a gourmet touch.
For those who want to get creative, consider adding a pinch of sea salt to enhance the flavors or a splash of vanilla extract for an aromatic twist. The exact quantities for each ingredient are available at the bottom of the article for easy printing!
How to Make Butterfinger Pie
Now that we have our ingredients ready, let’s dive into making this delightful Butterfinger Pie! Follow these simple steps, and you’ll have a delicious dessert that’s sure to impress.
Step 1: Prepare the Peanut Butter Mixture
Start by grabbing a mixing bowl. Add the creamy peanut butter and powdered sugar. Using a spatula or a hand mixer, blend them together until the mixture is smooth and creamy. This step is crucial because it sets the foundation for our pie. The sweetness of the sugar balances the rich peanut butter perfectly!
Step 2: Fold in the Whipped Topping
Next, it’s time to lighten things up! Gently fold in the whipped topping into the peanut butter mixture. Use a spatula to combine them, being careful not to deflate the whipped topping. This will keep your pie light and airy. The fluffy texture is what makes this Butterfinger Pie so irresistible!
Step 3: Assemble the Pie
Now, let’s bring it all together. Take your pre-made graham cracker crust and spread the peanut butter mixture evenly into it. Use the spatula to smooth the top, making it look nice and inviting. This crust is the perfect base, adding a delightful crunch to each bite!
Step 4: Add the Butterfinger Topping
Here comes the fun part! Sprinkle the crushed Butterfinger candy bars generously over the top of the pie. Make sure to cover the entire surface for that delicious crunch in every slice. The combination of creamy and crunchy is what makes this dessert a true delight!
Step 5: Drizzle with Chocolate Syrup
To finish off this masterpiece, drizzle chocolate syrup over the top. You can be as generous as you like! This adds a rich chocolate flavor that complements the peanut butter and Butterfinger perfectly. It’s like the cherry on top, but way better!
Step 6: Refrigerate
Finally, it’s time to let the pie chill. Place it in the refrigerator for at least 2 hours. This step is essential because it allows the flavors to meld together and the pie to set. Trust me, the wait will be worth it when you take that first bite!
Tips for Success
- Make sure your peanut butter is at room temperature for easier mixing.
- For a smoother texture, sift the powdered sugar before adding it to the peanut butter.
- Use a rubber spatula to fold in the whipped topping gently; this keeps the mixture light.
- Chill the pie overnight for the best flavor and texture.
- Feel free to customize the toppings with extra crushed Butterfinger or even chopped nuts!
Equipment Needed
- Mixing bowl: A medium-sized bowl works best. You can also use a large measuring cup if you’re short on space.
- Spatula: A rubber spatula is ideal for mixing and folding. A wooden spoon can work in a pinch.
- Hand mixer: Optional, but it makes blending easier. A whisk will do if you prefer a workout!
- Refrigerator: Essential for chilling the pie. A cooler can work if you’re in a pinch!
Variations
- Chocolate Peanut Butter Pie: Swap out half of the peanut butter for chocolate peanut butter for an extra chocolatey twist.
- Nut-Free Option: Use sun butter or soy nut butter instead of peanut butter for a nut-free version that’s just as delicious.
- Vegan Butterfinger Pie: Substitute the whipped topping with coconut whipped cream and use dairy-free chocolate syrup for a vegan-friendly treat.
- Mini Butterfinger Pies: Make individual servings by using mini graham cracker crusts. Perfect for parties or portion control!
- Frozen Butterfinger Pie: Freeze the pie instead of refrigerating for a refreshing frozen dessert on hot days. Just let it sit for a few minutes before slicing!
Serving Suggestions
- Pair with a scoop of vanilla ice cream for a delightful contrast in temperature and texture.
- Serve alongside fresh berries for a pop of color and a hint of tartness.
- Drizzle extra chocolate syrup on the plate for an elegant presentation.
- Garnish with whipped cream and a sprinkle of crushed Butterfinger for a stunning finish.
- Enjoy with a cup of coffee or a glass of cold milk to balance the sweetness!
FAQs about Butterfinger Pie
As you embark on your Butterfinger Pie journey, you might have a few questions. Don’t worry; I’ve got you covered! Here are some common queries that fellow dessert enthusiasts often ask:
Can I make Butterfinger Pie ahead of time?
Absolutely! This no-bake pie is perfect for making ahead. Just prepare it the day before and let it chill overnight. The flavors will deepen, making it even more delicious!
How long does Butterfinger Pie last in the fridge?
Your Butterfinger Pie can be stored in the refrigerator for up to three days. Just make sure to cover it well to keep it fresh and tasty!
Can I use other candy bars instead of Butterfinger?
Of course! Feel free to experiment with your favorite candy bars. Snickers, Reese’s, or even crushed Oreos can add a fun twist to this pie!
Is Butterfinger Pie suitable for special diets?
This pie can be adapted for various diets. For a vegan version, swap the whipped topping for coconut cream and use dairy-free chocolate syrup. It’s all about making it work for you!
What can I serve with Butterfinger Pie?
Pair it with a scoop of vanilla ice cream or fresh berries for a delightful contrast. A drizzle of chocolate syrup on the plate adds a touch of elegance!
Final Thoughts
Creating this Butterfinger Pie is more than just making a dessert; it’s about bringing joy to your kitchen and your loved ones. The delightful combination of creamy peanut butter, crunchy Butterfinger, and rich chocolate syrup creates a symphony of flavors that will have everyone smiling. Whether you’re celebrating a special occasion or simply treating yourself after a long day, this pie is sure to impress. Plus, the ease of preparation means you can enjoy the process without the stress. So, roll up your sleeves, gather your ingredients, and let the sweet magic of Butterfinger Pie brighten your day!
Print
Butterfinger Pie: Discover the Easiest Recipe Today!
- Prep Time: 15 minutes
- Cook Time: 0 minutes
- Total Time: 2 hours 15 minutes
- Yield: 8 servings 1x
- Category: Dessert
- Method: No-bake
- Cuisine: American
- Diet: Vegetarian
Description
A delicious and easy-to-make Butterfinger Pie that combines creamy peanut butter and chocolate flavors with a crunchy Butterfinger topping.
Ingredients
- 1 pre-made graham cracker crust
- 1 cup creamy peanut butter
- 1 cup powdered sugar
- 1 cup whipped topping
- 1 cup Butterfinger candy bars, crushed
- 1/2 cup chocolate syrup
Instructions
- In a mixing bowl, combine the peanut butter and powdered sugar until smooth.
- Fold in the whipped topping until well combined.
- Spread the peanut butter mixture into the graham cracker crust.
- Sprinkle the crushed Butterfinger candy bars on top.
- Drizzle chocolate syrup over the top.
- Refrigerate for at least 2 hours before serving.
Notes
- For a richer flavor, use crunchy peanut butter.
- Store leftovers in the refrigerator for up to 3 days.
- Can be topped with additional whipped topping if desired.
Nutrition
- Serving Size: 1 slice
- Calories: 350
- Sugar: 25g
- Sodium: 150mg
- Fat: 20g
- Saturated Fat: 8g
- Unsaturated Fat: 10g
- Trans Fat: 0g
- Carbohydrates: 35g
- Fiber: 1g
- Protein: 5g
- Cholesterol: 10mg


")