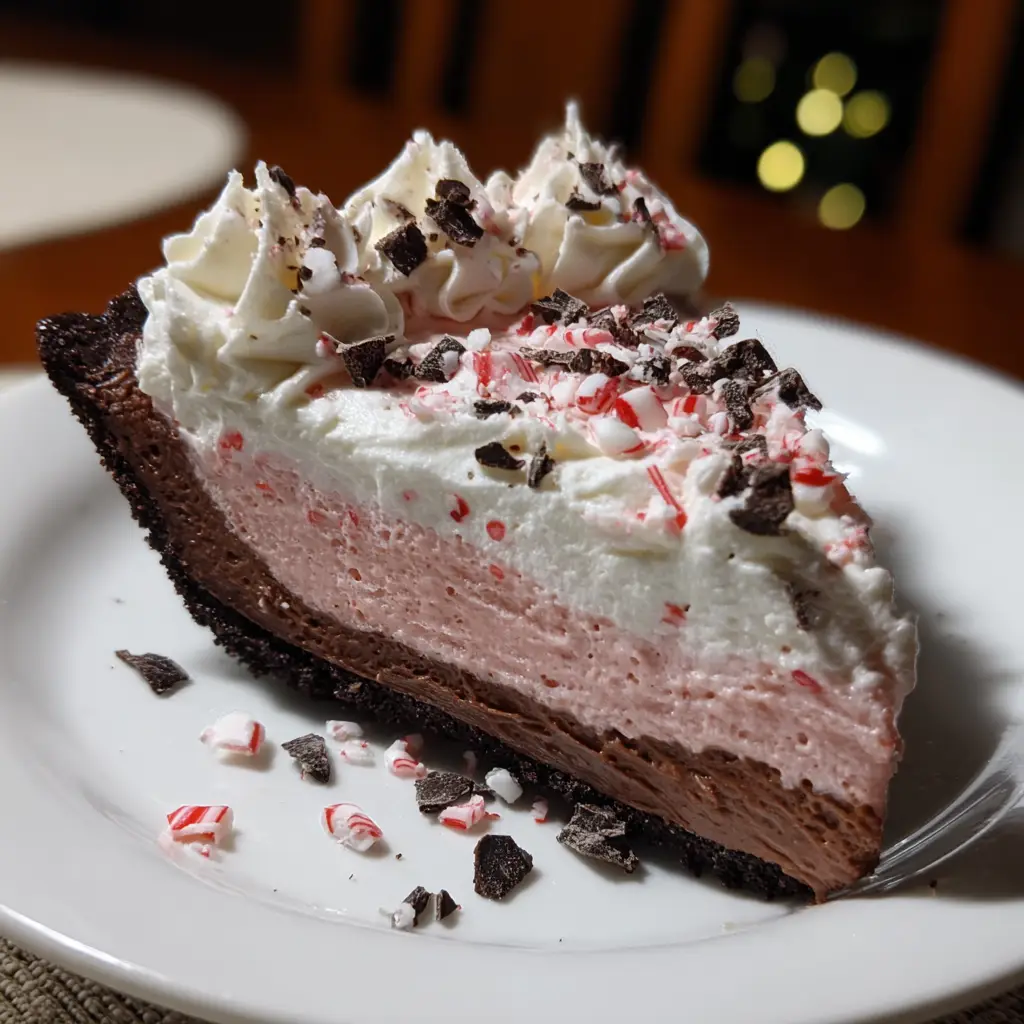
Introduction to No-Bake Candy Cane Pie
As the holiday season approaches, I find myself searching for that perfect dessert that brings joy without the fuss. Enter the No-Bake Candy Cane Pie! This delightful treat is not only a feast for the eyes but also a quick solution for busy days filled with holiday cheer. With its creamy filling and festive crunch, it’s sure to impress your loved ones. Plus, it requires no baking, which means more time for you to enjoy the season. Let’s dive into this easy recipe that will make your holiday gatherings even sweeter!
Why You’ll Love This No-Bake Candy Cane Pie
This No-Bake Candy Cane Pie is a holiday miracle for busy moms and professionals alike. It’s incredibly easy to whip up, taking just 20 minutes of your time. The creamy, dreamy filling paired with the crunch of candy canes creates a flavor explosion that will have everyone asking for seconds. Plus, it’s a make-ahead dessert, allowing you to focus on what truly matters—spending time with family and friends!
Ingredients for No-Bake Candy Cane Pie
Gathering the right ingredients is the first step to creating this festive No-Bake Candy Cane Pie. Here’s what you’ll need:
- Pre-made graham cracker crust: This saves time and adds a sweet, crunchy base. You can find it in most grocery stores.
- Cream cheese: Softened to room temperature, it gives the pie its rich, creamy texture. Make sure it’s well-mixed for a smooth filling.
- Powdered sugar: This sweetener blends seamlessly into the cream cheese, adding just the right amount of sweetness without any graininess.
- Whipped topping: Light and airy, it helps create a fluffy filling. You can use store-bought or make your own for a fresher taste.
- Peppermint extract: A little goes a long way! This adds that signature holiday flavor. For a stronger kick, feel free to increase the amount.
- Crushed candy canes: These not only add a festive crunch but also a burst of peppermint flavor. You can crush them yourself or buy pre-crushed versions.
- Additional crushed candy canes for garnish: This is optional but adds a beautiful touch when serving.
For exact measurements, check the bottom of the article where you can find everything listed for easy printing. Now that you have your ingredients ready, let’s get started on this delightful holiday treat!
How to Make No-Bake Candy Cane Pie
Now that we have our ingredients ready, let’s dive into the fun part—making this No-Bake Candy Cane Pie! Follow these simple steps, and you’ll have a festive dessert that’s sure to impress.
Step 1: Prepare the Cream Cheese Mixture
Start by placing your softened cream cheese in a mixing bowl. Using an electric mixer, beat it until it’s smooth and creamy. This step is crucial! If your cream cheese is cold, it will be lumpy. So, make sure it’s at room temperature for easy mixing.
Step 2: Add Sweetness and Flavor
Next, add the powdered sugar and peppermint extract to the cream cheese. Mix them together until everything is well combined. The sweetness of the sugar balances perfectly with the refreshing peppermint flavor. It’s like a holiday hug in a bowl!
Step 3: Fold in the Whipped Topping
Now, it’s time to fold in the whipped topping. This is where the magic happens! Gently fold the whipped topping into the cream cheese mixture using a spatula. Be careful not to overmix; you want to keep that light, airy texture. Think of it as a dance—gentle and graceful!
Step 4: Incorporate the Candy Canes
Once your mixture is fluffy, stir in the crushed candy canes. This adds that festive crunch we all love. Make sure to mix them in evenly, so every bite has a delightful burst of peppermint. It’s like adding a sprinkle of holiday cheer!
Step 5: Assemble the Pie
Now, pour the creamy mixture into your pre-made graham cracker crust. Use a spatula to spread it evenly. This is where your pie starts to take shape! Smooth the top for a beautiful finish. It’s like icing a cake, but way easier!
Step 6: Chill to Perfection
Finally, it’s time to chill your pie. Place it in the refrigerator for at least 4 hours, or until it’s set. This step is essential for achieving that perfect slice. While you wait, you can sip on some hot cocoa and enjoy the holiday spirit!
Tips for Success
- Ensure your cream cheese is at room temperature for easy mixing.
- For a stronger peppermint flavor, increase the peppermint extract to 1 teaspoon.
- Use a spatula to gently fold in the whipped topping to maintain fluffiness.
- Chill the pie overnight for the best texture and flavor.
- Garnish with extra crushed candy canes just before serving for a festive touch.
Equipment Needed
- Mixing bowl: A large bowl for combining ingredients. A sturdy glass or ceramic bowl works well.
- Electric mixer: For beating the cream cheese. A whisk can be used, but it requires more effort.
- Spatula: Essential for folding in the whipped topping and spreading the mixture.
- Refrigerator: To chill the pie until set. A cooler can work in a pinch!
Variations
- Chocolate Drizzle: Add a rich chocolate drizzle on top for a decadent twist. Melt some chocolate chips and drizzle them over the pie before serving.
- Gluten-Free Option: Use a gluten-free graham cracker crust to make this pie suitable for those with gluten sensitivities.
- Vegan Version: Substitute cream cheese with a vegan cream cheese alternative and use coconut whipped cream instead of regular whipped topping.
- Mint Chocolate Chip: Mix in some mini chocolate chips along with the crushed candy canes for a delightful mint chocolate flavor.
- Fruit Topping: Top the pie with fresh berries or sliced bananas for a fruity contrast to the creamy filling.
Serving Suggestions for No-Bake Candy Cane Pie
- Pair with a dollop of whipped cream on top for extra creaminess.
- Serve alongside a warm cup of hot chocolate or peppermint tea for a cozy touch.
- Garnish with fresh mint leaves for a pop of color and freshness.
- Present on a festive platter with additional crushed candy canes sprinkled around.
- Slice into wedges and serve with a side of chocolate sauce for drizzling.
FAQs about No-Bake Candy Cane Pie
Can I make No-Bake Candy Cane Pie ahead of time?
Absolutely! This pie is perfect for making a day in advance. Just keep it covered in the refrigerator until you’re ready to serve. It allows the flavors to meld beautifully!
How long does No-Bake Candy Cane Pie last in the fridge?
This delightful dessert can last up to 5 days in the refrigerator. Just make sure to cover it well to keep it fresh and tasty!
Can I use a different crust for this pie?
Yes! While a graham cracker crust is traditional, you can use an Oreo crust or even a gluten-free crust if you prefer. The choice is yours!
What can I substitute for cream cheese?
If you’re looking for a lighter option, you can use Greek yogurt or a vegan cream cheese alternative. Both will work well in this No-Bake Candy Cane Pie!
Is this pie suitable for kids?
Definitely! Kids love the sweet, creamy filling and the fun crunch of candy canes. Just be mindful of the peppermint flavor if you have little ones who might be sensitive to it.
Final Thoughts
Creating this No-Bake Candy Cane Pie is more than just whipping up a dessert; it’s about sharing joy and warmth during the holiday season. Each slice is a reminder of festive gatherings, laughter, and cherished memories with loved ones. The creamy filling and crunchy candy canes bring a delightful balance that makes every bite a celebration. Plus, the ease of preparation means you can focus on what truly matters—spending time with family. So, gather your ingredients, embrace the holiday spirit, and let this pie be the sweet centerpiece of your celebrations!
Print
No-Bake Candy Cane Pie: The Perfect Holiday Dessert!
- Prep Time: 20 minutes
- Cook Time: 0 minutes
- Total Time: 4 hours 20 minutes
- Yield: 8 servings 1x
- Category: Dessert
- Method: No-Bake
- Cuisine: American
- Diet: Vegetarian
Description
A delightful and festive no-bake dessert featuring a creamy filling and crushed candy canes, perfect for the holiday season.
Ingredients
- 1 pre-made graham cracker crust
- 8 oz cream cheese, softened
- 1 cup powdered sugar
- 1 cup whipped topping
- 1/2 tsp peppermint extract
- 1/2 cup crushed candy canes
- Additional crushed candy canes for garnish
Instructions
- In a mixing bowl, beat the softened cream cheese until smooth.
- Add the powdered sugar and peppermint extract, mixing until well combined.
- Fold in the whipped topping gently until fully incorporated.
- Stir in the crushed candy canes.
- Pour the mixture into the graham cracker crust and spread evenly.
- Refrigerate for at least 4 hours or until set.
- Garnish with additional crushed candy canes before serving.
Notes
- For a stronger peppermint flavor, increase the peppermint extract to 1 tsp.
- Make sure the cream cheese is at room temperature for easier mixing.
- This pie can be made a day in advance for convenience.
Nutrition
- Serving Size: 1 slice
- Calories: 250
- Sugar: 20g
- Sodium: 150mg
- Fat: 12g
- Saturated Fat: 7g
- Unsaturated Fat: 3g
- Trans Fat: 0g
- Carbohydrates: 32g
- Fiber: 1g
- Protein: 3g
- Cholesterol: 30mg


")