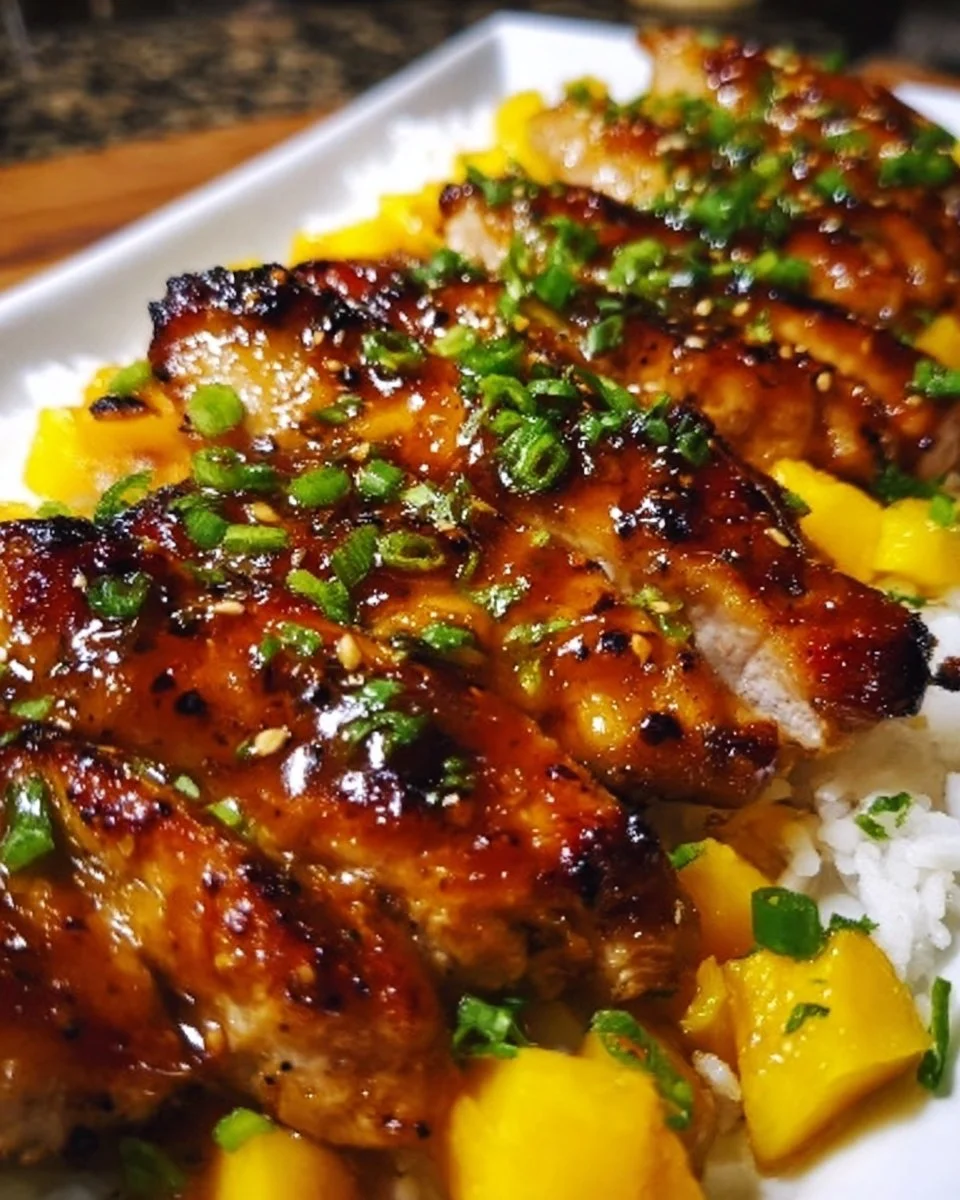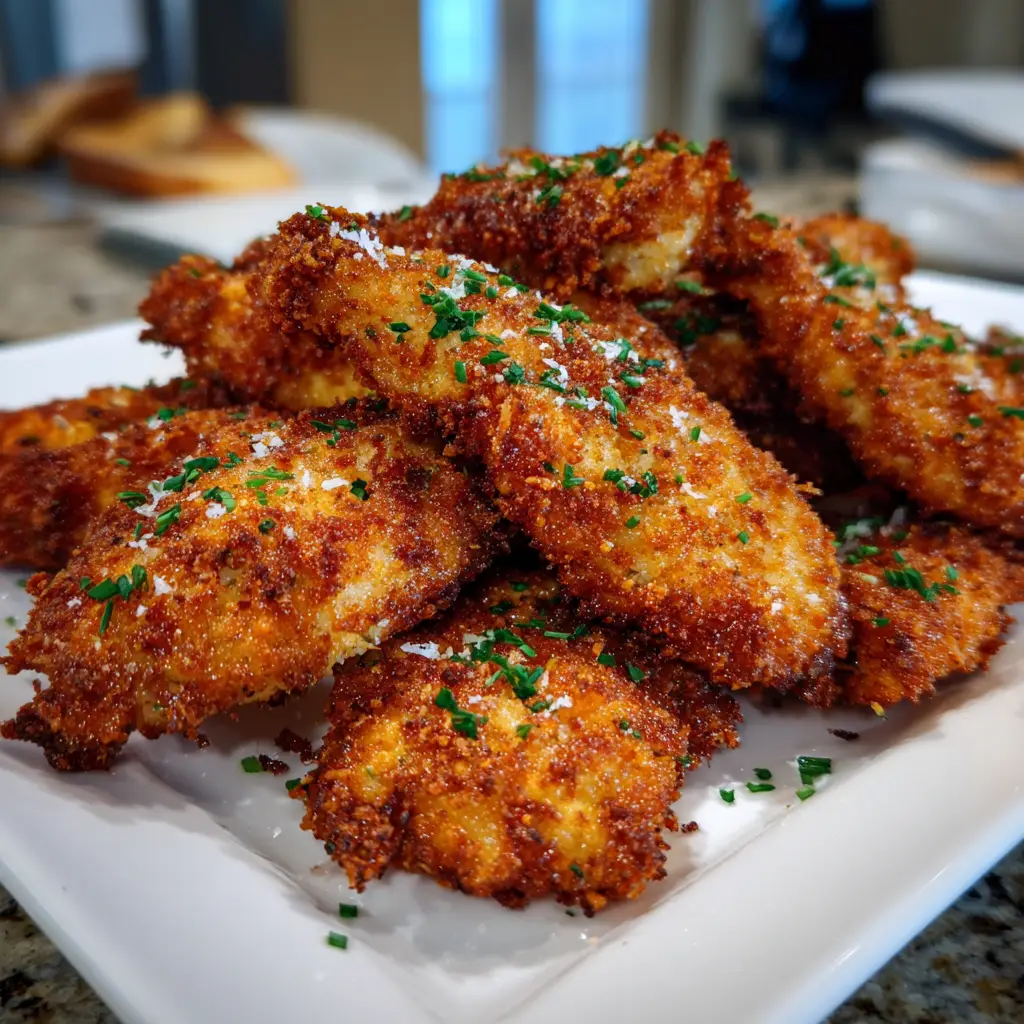
In the universal hierarchy of comfort foods, few dishes claim the throne with the democratic appeal and outright deliciousness of the perfect chicken tender. But not all tenders are created equal. Enter the Crispy Panko Chicken Tenders, a culinary upgrade that transforms the humble tender into a textural masterpiece worthy of a standing ovation. This is the secret to achieving that elusive, crave-worthy crunch that stands up to dipping and stays shatteringly crisp from the first bite to the last. The magic lies in the Japanese-style Panko breadcrumbs: airier, flakier, and crisper than traditional breadcrumbs, they create a delicate, golden, and incredibly crunchy armor around juicy, seasoned chicken breast.
Why Is This Crispy Panko Chicken Tenders So Popular?
The runaway popularity of Crispy Panko Chicken Tenders is a direct result of their unparalleled textural superiority and incredible versatility. In a world of soggy, bland, or overly greasy fried foods, the Panko crust is a game-changer. Its unique, shard-like structure fries up lighter and crispier than any other coating, providing an immensely satisfying auditory and tactile experience with every bite. This isn’t just a coating; it’s an event.
Furthermore, they are a universal crowd-pleaser. They cross generational and cultural lines, delighting picky children and discerning adults alike. Their popularity is also fueled by their adaptability. They can be baked for a lighter weeknight meal, air-fried for a quick and healthy crunch, or pan-fried for that classic golden indulgence. The seasoning profile is endlessly customizable—add Italian herbs, smoky paprika, Parmesan cheese, or spicy cayenne to make them your own. They are the perfect party food, easy to eat with one hand, perfectly dippable, and guaranteed to disappear from any platter. In essence, they take a familiar favorite and elevate it to its most perfect, crunchy potential, making them a beloved staple in home kitchens everywhere.
Why You’ll Love This Crispy Panko Chicken Tenders
- The Ultimate Crunch: The Panko breadcrumbs create an incomparably light, crispy, and non-greasy crust that stays crunchy long after cooking.
- Juicy & Tender Every Time: A quick brine or buttermilk soak ensures the chicken breast stays moist and flavorful, never dry or stringy.
- Foolproof Breading Technique: The simple flour-egg-Panko method creates a perfect, adhesive “glue” that guarantees the crispy coating stays firmly attached.
- Multiple Cooking Methods: Achieve perfect results whether you bake, air fry, or pan fry, allowing you to choose based on time, health, or preference.
- Endless Flavor Possibilities: The neutral base is a perfect canvas for any spice blend, herb, or cheese addition, making it your signature dish.
Here’s what you’ll need:
For the Chicken & Brine (Optional but Recommended):
- 1.5 lbs boneless, skinless chicken breasts, cut into 1-inch thick strips
- 2 cups buttermilk OR 2 cups cold water + 2 tbsp salt (for a 1-4 hour brine)
- 1 teaspoon garlic powder
- 1 teaspoon onion powder
For the Breading Station:
- 1 cup all-purpose flour
- 2 teaspoons garlic powder
- 2 teaspoons paprika (smoked or sweet)
- 1 teaspoon onion powder
- 1 teaspoon salt
- ½ teaspoon black pepper
- 3 large eggs
- 2 tablespoons milk or water
- 2 cups Panko breadcrumbs (Japanese-style)
- Optional Add-Ins to Panko: ½ cup grated Parmesan cheese, 1 tsp dried Italian herbs, ½ tsp cayenne pepper.
For Cooking:
- For Baking: ¼ cup neutral oil (like avocado or canola) for drizzling.
- For Pan Frying: ½ to ¾ cup neutral oil for shallow frying.
- For Air Frying: 1-2 tablespoons oil spray.
For Serving:
- Your favorite dipping sauces: Honey Mustard, BBQ, Ranch, Sweet Chili, etc.
- Lemon wedges
- Fresh parsley, chopped
How to Make Crispy Panko Chicken Tenders
Now that you have your ingredients ready, let’s dive into the steps for making this delightful Crispy Panko Chicken Tenders. It’s as easy as pie, and I promise you’ll feel like a culinary superstar!
Step 1: Tenderness Prep (The Key to Juicy Chicken)
If time allows, place the chicken strips in a bowl with buttermilk (or saltwater brine). Add 1 tsp each garlic and onion powder. Stir, cover, and refrigerate for at least 1 hour, or up to 4 hours. This step tenderizes the chicken and infuses flavor. If short on time, season the strips generously and proceed—it will still be delicious.
Step 2: Set Up Your Breading Assembly Line
This is crucial for efficiency and clean hands. Set up three shallow dishes (pie plates or wide bowls work perfectly).
- Dish 1 (Flour Mix): Whisk together the 1 cup flour, 2 tsp garlic powder, 2 tsp paprika, 1 tsp onion powder, 1 tsp salt, and ½ tsp black pepper.
- Dish 2 (Egg Wash): Whisk the 3 eggs with 2 tablespoons of milk or water until smooth.
- Dish 3 (Panko): Place the Panko breadcrumbs (and any optional add-ins like Parmesan) in the third dish.
Step 3: The Breading Process (The “Dry-Wet-Dry” Method)
Remove chicken from brine and pat very dry with paper towels. Moisture is the enemy of adhesion.
- Dredge in Flour: Coat a chicken strip thoroughly in the seasoned flour mixture, shaking off excess.
- Dip in Egg Wash: Dunk the floured strip into the egg wash, allowing the excess to drip off.
- Press in Panko: Place the strip into the Panko. Use your dry hand to scoop crumbs over the top and press firmly to ensure a thick, even, compact layer of crumbs adheres. This pressing step is the secret to the crunch.
- Place the breaded tender on a parchment-lined baking sheet or plate. Repeat with all strips.
Step 4: The All-Important Rest
Let the breaded tenders sit at room temperature for 10-15 minutes before cooking. This allows the coating to set, which prevents it from falling off during cooking.
Step 5: Choose Your Cooking Method
- To Bake (Easiest & Healthier): Preheat oven to 425°F (220°C). Arrange tenders on a wire rack set over a baking sheet (for maximum crispness). Generously drizzle or spray with oil. Bake for 15-18 minutes, flipping halfway, until golden brown and internal temperature reaches 165°F (74°C).
- To Air Fry (Fast & Crispy): Preheat air fryer to 400°F (200°C). Spray basket with oil. Place tenders in a single layer, not touching. Spray tops with oil. Cook for 8-10 minutes, flip, spray again, and cook 4-6 minutes more until golden and cooked through.
- To Pan Fry (Classic & Indulgent): Heat ½ inch of oil in a large skillet over medium heat (350°F/175°C). Fry tenders in batches for 3-4 minutes per side until deeply golden. Drain on a wire rack over paper towels.
Step 6: Drain and Serve Immediately
Regardless of method, let tenders rest for 2-3 minutes on a wire rack (not a plate, to avoid sogginess). This lets the crust firm up and the juices settle.
Step 7: Garnish and Dive In!
Serve immediately while piping hot and crispy. Garnish with chopped parsley and lemon wedges. Provide an array of dipping sauces for the ultimate experience.
Tips for Success
- Pat the Chicken DRY: This is the #1 rule. Any surface moisture will create steam and cause the coating to slip off.
- Press the Panko: Don’t just sprinkle. Actively press the crumbs into the egg wash to form a solid, cohesive layer.
- Use a Wire Rack: For baking or draining, a wire rack is essential. It allows hot air to circulate all around the tender, preventing a soggy bottom.
- Don’t Crowd the Pan: Whether baking or frying, give the tenders space. Crowding creates steam, which is the enemy of crispiness.
- Check Temperature: Use an instant-read thermometer. Pull the tenders at 160-162°F (71-72°C); they’ll carry over to 165°F (74°C) as they rest.
Equipment Needed
- 3 Shallow Dishes (for breading station)
- Wire Rack & Baking Sheet
- Tongs
- Heavy Skillet (for pan frying) or Air Fryer
- Instant-Read Thermometer
Variations of Crispy Panko Chicken Tenders
- Parmesan-Herb: Add ½ cup grated Parmesan and 1 Tbsp Italian seasoning to the Panko.
- Buffalo Style: After cooking, toss hot tenders in ½ cup Buffalo wing sauce. Serve with blue cheese dressing.
- Gluten-Free: Use gluten-free all-purpose flour and certified gluten-free Panko breadcrumbs.
- “Nashville Hot” Panko: Add 2 tbsp hot sauce to the egg wash. After frying, brush with a spicy mixture of ¼ cup melted butter, 2 tbsp cayenne, 1 tsp paprika, and ½ tsp garlic powder.
- Asian-Inspired: Add 1 tbsp soy sauce and 1 tsp sesame oil to the egg wash. Mix 1 tbsp white sesame seeds into the Panko. Serve with sweet chili sauce.
Serving Suggestions for Crispy Panko Chicken Tenders
- The Classic Basket: Serve in a basket or on a platter with fries, coleslaw, and dipping sauces.
- On a Salad: Slice and place atop a Caesar or garden salad for a protein-packed crunch.
- As a Sandwich: Pile into a toasted brioche bun with lettuce, tomato, and comeback sauce.
- With Dipping Sauces: Offer a trio: Honey Mustard, Creamy Ranch, and Spicy BBQ.
Prep Time:
20 minutes (+ optional 1-hour brine time)
Cooking Time:
15 minutes
Total Time:
35 minutes (plus brining)
Nutritional Information:
(Per serving, 3-4 tenders, baked, estimated)
Calories: ~380
Protein: 42g
Sodium: 750mg
Sugar: 3g
Fat: 12g
Carbohydrates: 25g
Fiber: 2g
FAQs about Crispy Panko Chicken Tenders
Q: Can I make these ahead of time?
A: You can bread the tenders and refrigerate them on a baking sheet for up to 4 hours before cooking. For best results, cook just before serving. You can also freeze uncooked, breaded tenders on a sheet, then transfer to a bag. Cook from frozen, adding 5-10 minutes to the cooking time.
Q: My coating fell off. Why?
A: The most common causes are: 1) Chicken wasn’t patted dry. 2) The egg wash was too thick (should be well-beaten). 3) The Panko wasn’t pressed on firmly enough. 4) The oil wasn’t hot enough before frying.
Q: Can I use regular breadcrumbs?
A: You can, but the texture will be denser, sandier, and less crispy. Panko is highly recommended for the signature light crunch.
Q: How do I reheat leftovers without them getting soggy?
A: Do not microwave. Reheat in a 375°F (190°C) oven or air fryer for 5-8 minutes until hot and re-crisped.
Q: Are these gluten-free?
A: Not as written. To make them gluten-free, use a GF all-purpose flour blend and certified gluten-free Panko breadcrumbs (available at most grocery stores).
Final Thoughts
Crispy Panko Chicken Tenders are more than a meal; they are a revelation in home cooking. They prove that with a few simple techniques and the right ingredient (Panko!), you can consistently create a dish that rivals the best pub or restaurant version, but with the quality and love only a home kitchen can provide. This recipe gives you the tools to achieve that perfect, shattering crunch and juicy interior that will have everyone asking for your secret. So, set up your breading station, embrace the process, and get ready to serve up a plate of pure, unadulterated crunchy joy. They’re the ultimate proof that sometimes, the simplest foods, done perfectly, are the most satisfying of all.