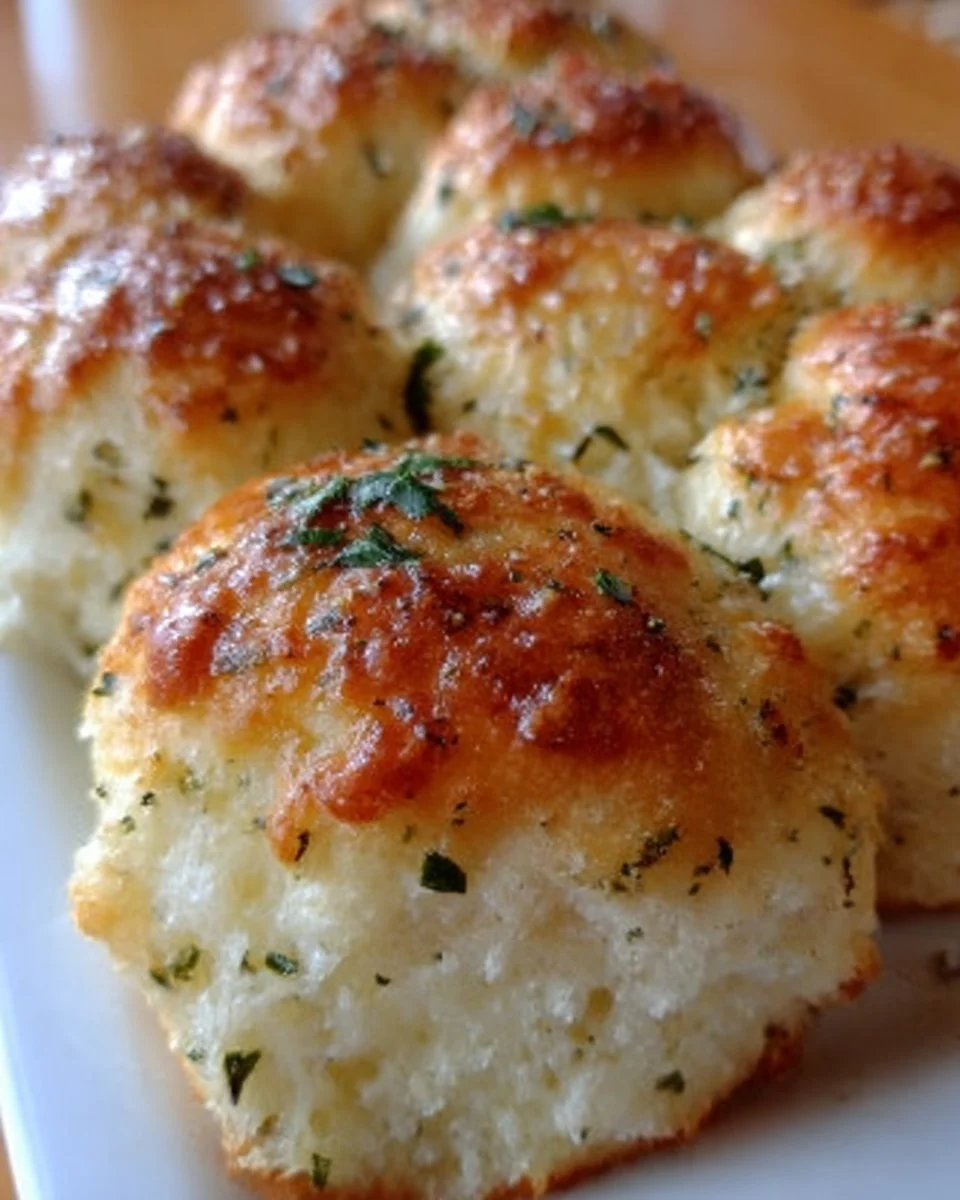
Garlic Herb Rolls transform an ordinary meal into an extraordinary desire, captivating hearts and tantalizing taste buds with every warm bite. Baked beautifully to a golden crisp outside, these rolls unveil a soft, pillowy center that beckons you to dive right in. The unmistakable aroma of garlic wafts through the kitchen, filling the air with an inviting warmth. Imagine biting into the tender dough, infused with the vibrant essence of fresh herbs and the savory richness of melted butter—it’s pure bliss.
Each roll invites cravings with its dynamic blend of flavors and textures. The slight crunch of the exterior, when you first break through, gives way to an ethereal softness that wraps around your senses like a comforting hug. Flecks of aromatic garlic and bursts of herby delight elevate these rolls from mere sides into the star of the meal. Whether slathered with a touch of creamy butter or devoured alone, each bite is a celebration of homemade goodness that draws families together around the dinner table.
Why You’ll Love This Garlic Herb Rolls
Garlic Herb Rolls shine as versatile crowd-pleasers, suitable for every occasion—easy weeknight dinners, festive holiday gatherings, or lazy weekend brunches. The captivating fusion of flavors makes them perfect companions for rich stews, zesty salads, or as a stand-alone snack, enticing even the pickiest of eaters. Beyond their mouth-watering taste, these rolls offer a delightful, comforting experience that warms the soul and invites laughter around the table.
The beauty of these rolls lies not only in their rich flavors but also in their simplicity. With just a handful of wholesome ingredients, they come together effortlessly. Moreover, the versatility shines through: add extra cheese for indulgence, play with spices for an extra kick, or substitute your favorite herbs for a personalized touch. With every bake, you get to create a unique twist that resonates with your culinary flair, allowing love and creativity to infuse each bite.
Preparation Phase & Tools to Use
To bring these beautiful Garlic Herb Rolls to life, you’ll want to gather minimal yet essential tools that ensure ease and efficiency in your kitchen:
-
Mixing Bowl: A large, sturdy mixing bowl allows you enough room to knead and thrive without mess.
-
Wooden Spoon or Dough Scraper: Perfect for stirring and incorporating ingredients thoroughly—no need for high-tech gadgets here!
-
Rolling Pin: Essential for rolling out the dough into the desired shape, giving you that perfect rectangle to fill.
-
Baking Dish: A greased rectangular pan creates the ideal environment for those rolls to rise beautifully and bake to perfection.
-
Pastry Brush: This handy tool delicately brushes garlic butter on top of the rolls just before serving, adding that irresistible sheen and extra flavor.
Before diving into mixing and baking, consider a few preparation tips: Always make sure your water is warm, not hot, to activate the yeast without killing it. Additionally, knead your dough lovingly; a gentle touch goes a long way in creating that soft, luscious texture everyone loves.
Ingredients for Garlic Herb Rolls
- 2 cups all-purpose flour: The backbone of the rolls, this flour gives structure. You can substitute with whole wheat or gluten-free flour for a healthier twist.
- 1 cup warm water: This hydrates the mixture and activates the yeast for those fluffy interiors.
- 1 tablespoon sugar: A touch of sweetness captures the yeasty goodness and enhances the browning.
- 1 tablespoon salt: Enhances flavor—don’t underestimate the magic seasoning brings to baked goods.
- 2 teaspoons instant yeast: The wonder ingredient that triggers delightful rising, creating that airy quality.
- 4 tablespoons unsalted butter: Infuses richness; melted butter adds luscious flavor, crucial in every bite.
- 2 tablespoons garlic, minced: The star of the show—fresh garlic brings boldness and depth to the rolls.
- 1 tablespoon fresh herbs (like parsley or thyme), chopped: Elevates every roll; feel free to swap based on seasonal availability.
- 1/2 cup cheese (like Parmesan or mozzarella), optional: An indulgent addition creates an ooey-gooey interior; opt for your preferred cheese.
How to Make Garlic Herb Rolls
-
Activate the Yeast: In a large bowl, combine warm water, sugar, and instant yeast. Let it rest for 5-10 minutes until foamy, indicating that the yeast is alive and ready.
-
Form the Dough: Add the all-purpose flour and salt to the yeast mixture. Stir with a wooden spoon or dough scraper until a soft dough forms.
-
Knead with Love: Flour your surface lightly and knead the dough for about 5-7 minutes until the surface feels smooth and elastic—it’s almost meditative!
-
Let It Rise: Transfer the dough to a greased bowl, cover it, and let it rise in a warm place for about 1 hour, or until it doubles in size.
-
Preheat to Perfection: While the dough rises, preheat your oven to 375°F (190°C), allowing it to reach that golden-baking temperature.
-
Create the Canvas: Roll the rising dough into a rectangle on a floured surface. Spread melted garlic butter generously over the dough, followed by the chopped herbs and cheese, if using.
-
Roll It Up: Tightly roll up the dough starting from one end and slice it into 12 equal pieces, ensuring all your rolls are uniform for even baking.
-
Arrange for Second Rise: Place the rolls into a greased baking dish, cover, and let them rise for another 30 minutes while your oven steadily heats.
-
Bake to Golden Goodness: Bake for 20-25 minutes, keeping a close watch until they turn beautifully golden brown.
-
Brush and Serve: Before serving, brush with additional melted garlic butter, which enhances flavor and aroma, creating a gorgeous finish.
Chef’s Notes & Helpful Tips
-
Make-Ahead Tips: You can prepare the dough the night before and let it rise overnight in the fridge. Just remember to bring it back to room temperature before rolling.
-
Cooking Alternatives: If you’re short on time, consider using an air fryer at 370°F for about 15-18 minutes for a crispy exterior and fluffy center.
-
Customization Ideas: Spice them up by incorporating sun-dried tomatoes, olives, or different cheeses. Or fold in spinach for a delightful twist!
Common Mistakes to Avoid
-
Ignoring the Yeast: When mixing ingredients, always ensure the yeast is active; otherwise, your dough could fail to rise. Always let it foam before adding to the mixture.
-
Over-kneading: Kneading is essential for gluten development, but don’t overdo it or the rolls could become tough. Stop kneading once the dough feels elastic and smooth.
-
Insufficient Rising Time: Allow enough time for the dough to rise. Rushing this step leads to dense rolls that miss that airy fluffiness we all crave.
What to Serve With Garlic Herb Rolls
Pair your Garlic Herb Rolls with a variety of delightful dishes, enhancing the experience with every meal:
-
Creamy Tomato Soup: The smoothness and acidity perfectly complement the garlicky notes of the rolls, making every dip a joy.
-
Hearty Beef Stew: Let the rolls soak up every rich, flavorful broth, creating a satisfying experience that fills your belly and warms your heart.
-
Caesar Salad: The crisp, cool greens add vibrance and crunch, making for an exciting contrast against the warm, soft rolls.
-
Pasta with Garlic Sauce: Deliver a double dose of garlicky goodness; the rolls offer robust bites after twirling delicious pasta.
-
Charcuterie Board: Where rolls meet cheese, meats, and other dips, creating opportunities for delightful snacking all evening long.
-
Roasted Chicken: The savory flavors of garlic herb rolls enhance juicy chicken, adding a delightful touch of flavor.
Storage & Reheating Instructions
To store, place your cooled garlic herb rolls in an airtight container. They can sit at room temperature for up to 2 days. If you wish to keep them longer, refrigerate them for up to a week or freeze for up to 3 months.
To reheat, pop them in a 350°F oven for about 5-10 minutes, or warm in the microwave for around 15-20 seconds. Enjoy them fresh and warm, as this is when they are at their absolute best.
Estimated Nutrition Information
- Calories: 150
- Carbohydrates: 25g
- Protein: 5g
- Fat: 4g
- Sugar: 1g
- Fiber: 1g
(Please note that the values can vary based on ingredient adjustments and portion sizes.)
FAQs
Can I use active dry yeast instead of instant yeast?
Absolutely! Just make sure to dissolve the active dry yeast in the warm water with the sugar first and let it bubble before mixing with the other ingredients.
What herbs work well with garlic rolls?
Parsley and thyme shine, but feel free to explore with rosemary, basil, or even oregano for exciting flavor profiles.
Can I make these rolls gluten-free?
Yes, substitute all-purpose flour with a gluten-free flour blend, ensuring to check that all other ingredients are also gluten-free.
How do I know when the rolls are done?
Look for a golden-brown exterior; lightly tapping the bottom of the rolls should sound hollow when they’re fully baked.
Can I add other ingredients, like cheese?
Yes! Feel free to fold in grated cheese or mix different herbs for added flavor and richness.
Conclusion
Garlic Herb Rolls encapsulate warmth, flavor, and comfort, capturing the essence of homemade indulgence. Each roll invites you to savor the process, from the instinctive kneading to the irresistible aroma wafting through your kitchen. The end result—a golden, crispy, and herb-infused roll—tantalizes every sense, turning any meal into a cherished experience. What are you waiting for? Gather your ingredients, roll up your sleeves, and fill your home with warmth and deliciousness by baking these delightful rolls. Your taste buds will thank you!
Print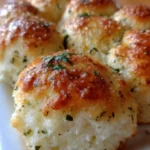
Garlic Herb Rolls
- Prep Time: 15 minutes
- Cook Time: 25 minutes
- Total Time: 40 minutes
- Yield: 12 rolls 1x
- Category: Side Dish
- Method: Baking
- Cuisine: Italian
- Diet: Vegetarian
Description
Delightfully soft and flavorful, these Garlic Herb Rolls are the perfect addition to any meal, boasting a crispy exterior and a tender, herb-infused center.
Ingredients
- 2 cups all-purpose flour
- 1 cup warm water
- 1 tablespoon sugar
- 1 tablespoon salt
- 2 teaspoons instant yeast
- 4 tablespoons unsalted butter, melted
- 2 tablespoons garlic, minced
- 1 tablespoon fresh herbs (like parsley or thyme), chopped
- 1/2 cup cheese (like Parmesan or mozzarella), optional
Instructions
- In a large bowl, combine warm water, sugar, and instant yeast. Let it rest for 5-10 minutes until foamy.
- Add the all-purpose flour and salt to the yeast mixture. Stir until a soft dough forms.
- Flour your surface lightly and knead the dough for about 5-7 minutes until smooth and elastic.
- Transfer the dough to a greased bowl, cover it, and let it rise in a warm place for about 1 hour, or until it doubles in size.
- Preheat your oven to 375°F (190°C).
- Roll the rising dough into a rectangle on a floured surface. Spread melted garlic butter over the dough, followed by the chopped herbs and cheese, if using.
- Tightly roll up the dough from one end and slice it into 12 equal pieces.
- Place the rolls into a greased baking dish, cover, and let them rise for another 30 minutes.
- Bake for 20-25 minutes until golden brown.
- Brush with additional melted garlic butter before serving.
Notes
Rolls can be prepared the night before and refrigerated for a convenient next day bake.
Nutrition
- Serving Size: 1 roll
- Calories: 150
- Sugar: 1g
- Sodium: 400mg
- Fat: 4g
- Saturated Fat: 2g
- Unsaturated Fat: 2g
- Trans Fat: 0g
- Carbohydrates: 25g
- Fiber: 1g
- Protein: 5g
- Cholesterol: 10mg