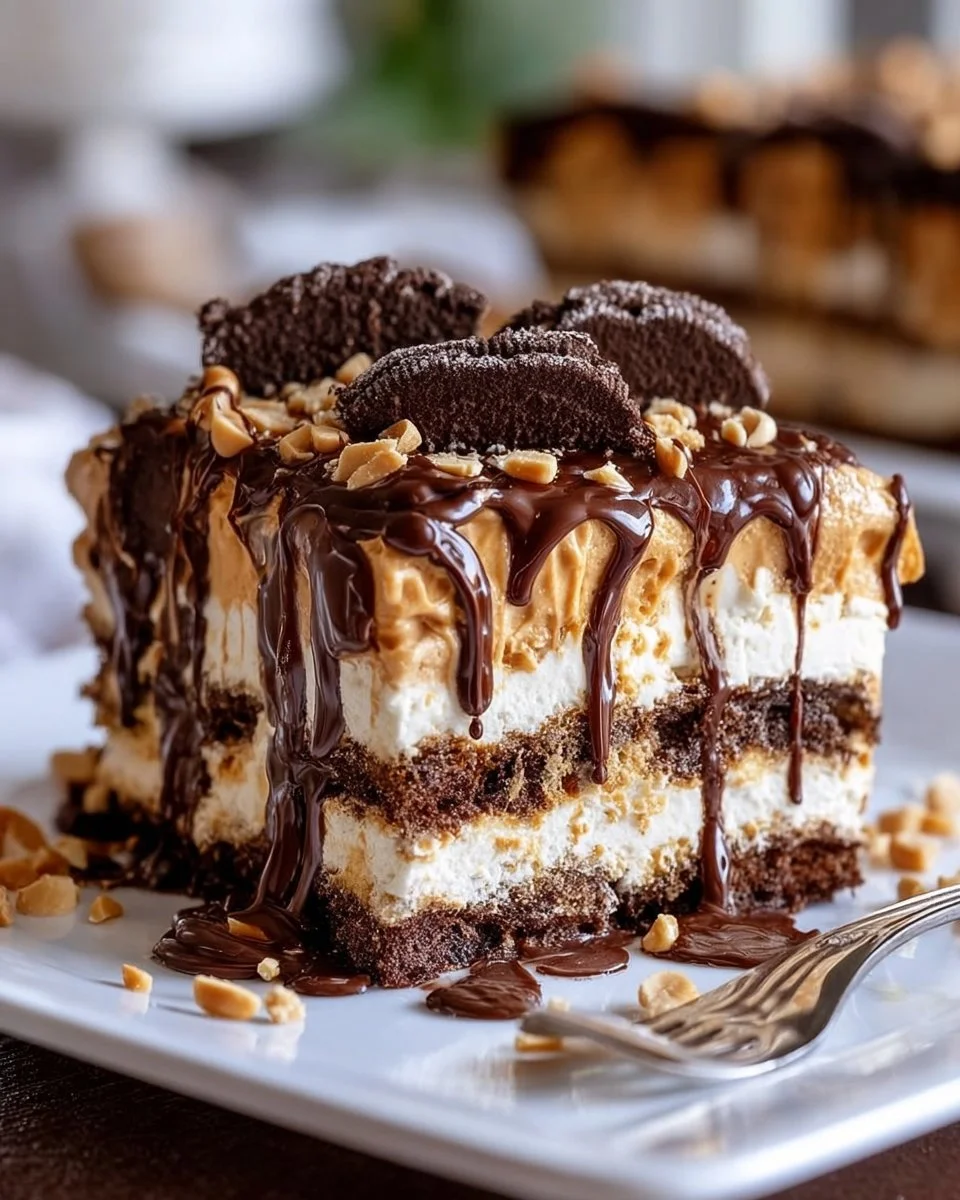
The sun beats down gently, casting a warm glow on the kitchen as you prepare to create a dessert that promises to evoke childhood nostalgia and comfort. The rich, inviting aroma of creamy peanut butter fills the air, mingling with hints of sweet chocolate as you unwrap the velvety cookies. Picture a treat that combines layers of smooth, rich frosting with the delightful crunch of cookies, each bite bringing a wave of satisfaction like a warm hug. This Peanut Butter Icebox Cake transforms simple ingredients into a celebration of flavor and texture, where every slice is a reminder of summertime picnics and cozy gatherings.
As you envision cutting into this luscious confection, you can already taste the heavenly balance between the creamy sweetness of peanut butter and the light, airy whip of fresh cream, perfectly complemented by a drizzle of chocolate syrup that glistens in the light. Each bite reveals a delightful play between the crunchy chocolate wafers and the creamy filling, creating a beautiful symphony of textures that dance across your palate. This icebox cake doesn’t just satisfy your sweet tooth; it creates lasting memories, drawing loved ones together with its irresistible charm.
Why You’ll Love This Peanut Butter Icebox Cake
This Peanut Butter Icebox Cake shines not just because of its enchanting flavors but also for its effortless preparation. Perfect for any occasion, from summer parties to cozy evenings at home, this dessert is a crowd-pleaser that never fails to impress. Every forkful offers a tantalizing blend of nostalgia and decadence, making it an ideal finish to family dinners or gatherings with friends.
The beauty of this cake lies in its simplicity. With minimal effort, you can create a dessert that looks impressive and tastes out of this world. Its no-bake nature allows for flexibility—prep it in advance and let it chill in the fridge while you enjoy your time with guests. The richness of peanut butter paired with the lightness of whipped cream showcases a delightful contrast, while the chocolate drizzle adds an irresistible allure that beckons you in for just one more slice.
Preparation Phase & Tools to Use
Before you dive into this scrumptious creation, garner the right tools to assure a smooth baking experience:
- Mixing Bowls: Use a large mixing bowl for the whipped cream and another for folding in the peanut butter to avoid any spills. Choose bowls that allow for ample whipping space.
- Electric Mixer: A handheld mixer or a stand mixer saves time and ensures perfect whipped cream consistency; the crisp peaks hold the blend of flavors beautifully.
- Spatula: A silicone spatula works wonders for folding and mixing without losing the airy texture of your whipped cream.
- Baking Dish: The dish should be just large enough to hold the assembled cookies without overcrowding, allowing for a neat shape.
Ingredients for Peanut Butter Icebox Cake
- 1 cup creamy peanut butter: The star of the show, providing rich, nutty flavor. For a healthier option, try natural peanut butter or almond butter for a different twist.
- 1 cup heavy cream: This adds a luscious creaminess. If you’re looking for a lighter option, consider whipped coconut cream.
- 1/2 cup powdered sugar: Sweetness perfectly balances the saltiness of the peanut butter. For a hint of sophistication, try substituting with maple sugar.
- 1 teaspoon vanilla extract: This bolsters the flavor profile. Opt for pure vanilla extract to enhance overall taste.
- 1 package chocolate wafer cookies: These add delightful crunch. Feel free to opt for homemade cookies if you’re adventurous.
- 1 cup chocolate syrup (for drizzling): Adds an eye-catching glaze and extra richness. Consider dark chocolate for a bolder display.
- Chopped peanuts (for garnish, optional): Sprinkle these for added texture and nutty flavor—pecans or almonds can also work beautifully.
How to Make Peanut Butter Icebox Cake
- Whip the Cream: In a large bowl, beat the heavy cream, powdered sugar, and vanilla extract until stiff peaks form. This creates a fluffy base filled with flavor.
- Fold in Peanut Butter: Carefully fold the peanut butter into the whipped cream mixture until well combined, ensuring you maintain that delightful airy texture.
- Assemble the Cookies: Take a chocolate wafer cookie and spread a generous layer of the peanut butter mixture on one side. Sandwich it with another cookie to create a soft, delectable layer.
- Build Your Cake: Repeat the layering process until you’ve used all the cookies and peanut butter mixture, forming a log shape. Don’t rush; the more careful the assembly, the more beautiful the final cake.
- Chill: Place the layered cookies in a baking dish and cover with plastic wrap. Chill in the fridge for at least 4 hours or overnight. The longer it sits, the better the flavors meld, creating that delectable, melt-in-your-mouth experience.
- Finish with a Drizzle: Before serving, drizzle warm chocolate syrup over the top and sprinkle with chopped peanuts for that final touch of elegance.
- Serve & Enjoy! Each slice reveals the crunchy, creamy layers and the richness that will transport you straight to dessert heaven.
Chef’s Notes & Helpful Tips
- Make-Ahead Tips: This cake is perfect for making in advance; the longer it chills, the more the flavors blend beautifully together. Make it a day or night before for an investment in flavor.
- Cooking Alternatives: While no-bake is the way to go here, you could loosely wrap the assembled cake and freeze for a chilled treat on hot days.
- Customization Ideas: Add layers of fresh berries or even banana slices between the cookies for a fruity twist that breathes freshness into this decadent dessert.
Common Mistakes to Avoid
- Neglecting Stiff Peaks: Failing to whip the cream to stiff peaks can result in a runny filling. Whip patiently; you’ll know it’s ready when the peaks stand tall.
- Rushing the Chill Time: Skipping the refrigeration time leads to a cake that falls apart. Give it the time it needs to set and meld together beautifully.
- Overfilling Cookies: Using too much filling can cause the cookies to split. A moderate amount keeps everything intact and makes for easy slicing.
What to Serve With Peanut Butter Icebox Cake
- Coffee: A steaming cup of coffee perfectly balances the richness of the cake, making for a delightful pairing.
- Milk: The classic duo—dipping a slice in cold milk brings back childhood memories of after-school snacks.
- Ice Cream: A scoop of vanilla or chocolate ice cream elevates the dessert experience, adding an extra layer of creaminess and flavor.
- Fresh Berries: The tartness of fresh raspberries or strawberries cuts through the richness of the cake, providing a refreshing contrast.
- Mint Tea: The soothing properties of mint tea offer a light, fragrant finish, perfect after a rich dessert.
- Chocolate-Covered Pretzels: For a sweet and salty duo, pair the cake with chocolate-covered pretzels that echo its crunchy, nutty notes.
- Caramel Drizzle: For an added touch of sweetness and decadence, drizzle caramel sauce over each serving.
Storage & Reheating Instructions
Store any leftovers in an airtight container in the fridge for up to 5 days. For longer storage, freeze the assembled cake before adding the chocolate drizzle, wrapping it tightly in plastic wrap and foil. It will keep for up to 2 months.
To enjoy it frozen or partially thawed, simply let it sit in the fridge for a few hours before serving.
Estimated Nutrition Information
Approximate values per serving:
- Calories: 350
- Protein: 7g
- Carbohydrates: 45g
- Fat: 15g
- Sugar: 20g
Disclaimer: Nutrition values may vary based on brands and measurements used.
FAQs
1. Can I use crunchy peanut butter instead of creamy?
Absolutely! Crunchy peanut butter adds an exciting texture that enhances the cake. Just be aware that it will give a slight change in creaminess.
2. Is it necessary to chill the cake overnight?
While chilling for at least four hours will solidify the dessert, overnight chilling deepens the flavors, making every bite even more delightful.
3. Can I make this gluten-free?
Yes! You can use gluten-free chocolate wafer cookies to maintain the integrity of the dish. The outcome will be just as delicious.
4. How can I customize the flavor?
Try incorporating different extracts, such as almond for a softer background, or even espresso powder for a mocha twist.
5. What if I don’t have chocolate syrup?
If chocolate syrup is unavailable, you could melt dark chocolate and drizzle it on top or even use melted peanut butter for an alternative approach.
Conclusion
Creating this Peanut Butter Icebox Cake effortlessly transports you back to those cherished moments of delight, laughter, and love. Its creamy texture and decadent flavors brighten any occasion while allowing ease of preparation. So, put on that apron, let the enticing aromas swirl around you, and embark on a sweet journey that promises satisfaction and joy. Each slice is not just a dessert; it’s an experience waiting to be shared. Dive in and remember to savor every moment!
Print
Peanut Butter Icebox Cake
- Prep Time: 15 minutes
- Cook Time: 0 minutes
- Total Time: 255 minutes
- Yield: 8 servings 1x
- Category: Dessert
- Method: No-Bake
- Cuisine: American
- Diet: Vegetarian
Description
A no-bake dessert combining creamy peanut butter and rich chocolate for a nostalgic treat.
Ingredients
- 1 cup creamy peanut butter
- 1 cup heavy cream
- 1/2 cup powdered sugar
- 1 teaspoon vanilla extract
- 1 package chocolate wafer cookies
- 1 cup chocolate syrup (for drizzling)
- Chopped peanuts (for garnish, optional)
Instructions
- Whip the Cream: In a large bowl, beat the heavy cream, powdered sugar, and vanilla extract until stiff peaks form.
- Fold in Peanut Butter: Carefully fold the peanut butter into the whipped cream mixture until well combined.
- Assemble the Cookies: Take a chocolate wafer cookie and spread a generous layer of the peanut butter mixture on one side. Sandwich it with another cookie.
- Build Your Cake: Repeat layering until all cookies and peanut butter mixture are used, forming a log shape.
- Chill: Place the assembled cookies in a baking dish, cover with plastic wrap, and chill in the fridge for at least 240 minutes or overnight.
- Finish with a Drizzle: Before serving, drizzle warm chocolate syrup over the top and sprinkle with chopped peanuts.
Notes
This cake is perfect for making in advance; the longer it chills, the more the flavors blend beautifully together.
Nutrition
- Serving Size: 1 slice
- Calories: 350
- Sugar: 20g
- Sodium: 200mg
- Fat: 15g
- Saturated Fat: 5g
- Unsaturated Fat: 8g
- Trans Fat: 0g
- Carbohydrates: 45g
- Fiber: 3g
- Protein: 7g
- Cholesterol: 30mg


")