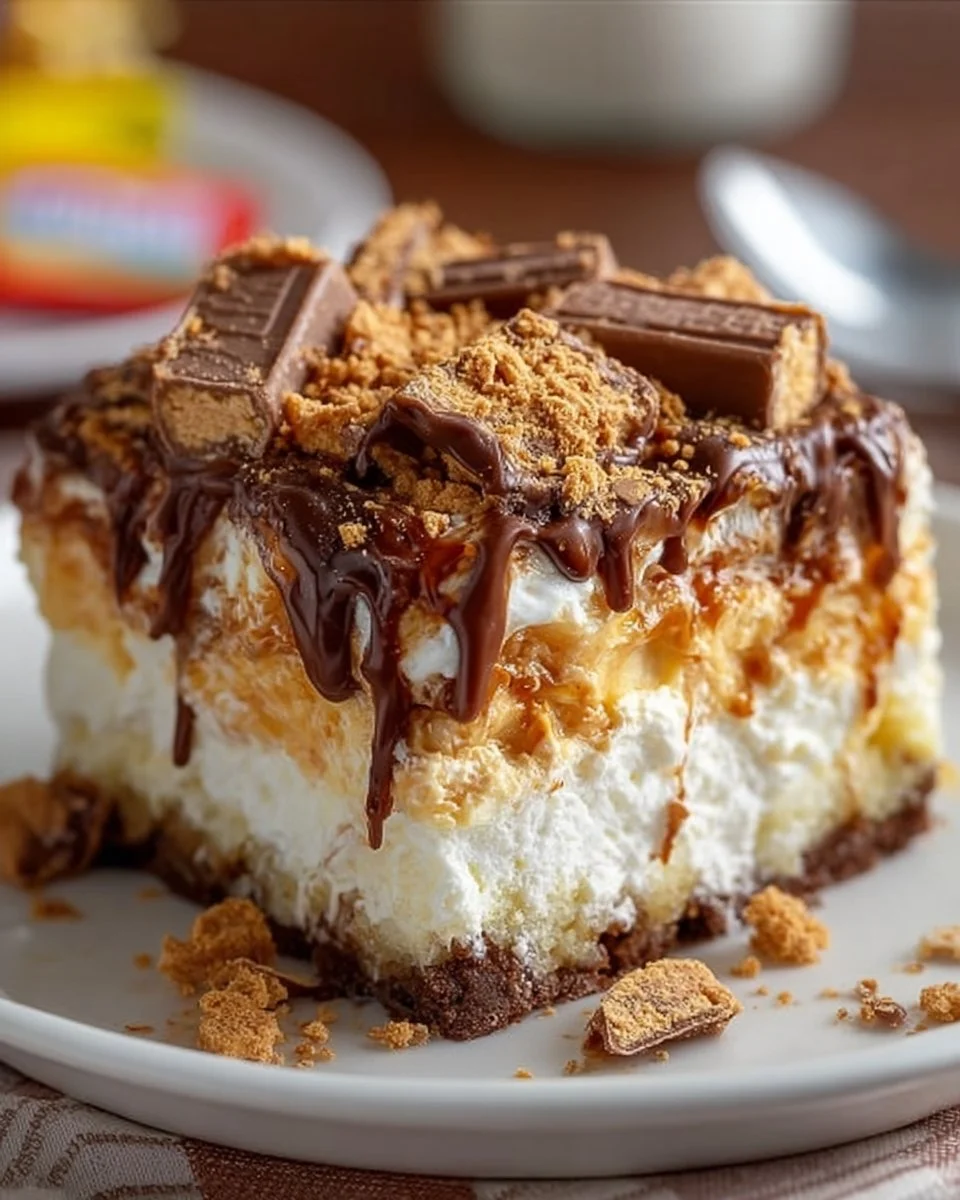
Bite into a slice of Butterfinger Candy Bar Poke Cake, and indulge in a delightful explosion of flavors that dances on your palate. The creamy richness of peanut butter melds effortlessly with the decadent sweetness of chocolate fudge sauce, all enveloped by the airy lightness of whipped topping. Each bite sends a wave of nostalgia, reminding you of the iconic candy bar you savored as a child. Meanwhile, the crunchy texture of the Butterfinger pieces adds a delightful contrast, inviting you to dive in for another glorious taste.
As the cake sits, the warm, golden sponge absorbs the luscious peanut butter mixture, creating an incredibly moist and flavorful dessert that beckons to be shared. This poke cake transforms from simple baking into a crowd-pleaser, capturing the hearts of friends and family alike. The aroma fills the room with warmth, enticing even those who claim to be “just not that into dessert” to have a slice— or maybe even two. It’s hard to resist when this masterpiece shines on the table, glistening with fudge sauce and topped with delightful candy crunch.
Why You’ll Love This Butterfinger Candy Bar Poke Cake
Every slice of this Butterfinger Candy Bar Poke Cake tells a story. It brings rich flavors and textures together, creating an unforgettable dessert experience. Perfect for birthday celebrations, family gatherings, or a simple sweet treat on a cozy evening, this cake stands out with its complexity yet simplicity in flavor. Not only does it captivate the taste buds, but it also offers a delightful visual presentation. The combination of golden cake, creamy peanut butter, and vibrant candy topping entices you to grab a fork and dive right in.
Beyond just being eye-catching, each element serves a purpose. The cake’s fluffy texture coupled with the rich, creamy layers creates an incredible mouthfeel. The sweetness balances beautifully with the subtle saltiness of peanut butter, while the crunchy Butterfinger pieces add an addictive crunch that contrasts the cake’s softness. This dessert isn’t merely food; it’s an experience, drawing everyone to gather around the table, sharing stories, laughter, and, of course, cake!
Preparation Phase & Tools to Use
Preparation is as crucial as the ingredients themselves in creating this masterpiece. Let’s gather some essential tools to make the process smooth and enjoyable.
- 9×13 inch Baking Pan: This size ensures even baking, creating a perfect canvas for your poke cake.
- Mixing Bowls: You’ll need large bowls for combining the cake mix and the peanut butter filling. They allow for ample space to mix and minimize mess.
- Wooden Spoon: The end of a wooden spoon works perfectly for poking holes in the cake, creating optimal spots for the peanut butter mixture to seep into.
- Whisk: Use it to combine your ingredients smoothly, ensuring a fluffy cake with no lumps.
- Spatula: A rubber spatula helps spread the whipped topping evenly over the entire cake, ensuring every bite is luscious.
Remember to take your time during the preparation phase. Each step builds on the previous one, layering flavors and textures, culminating in your unforgettable dessert.
Ingredients for Butterfinger Candy Bar Poke Cake
- 1 box yellow cake mix: Opt for the classic flavor that delivers a light and airy texture.
- 1 cup water: Keeps the cake moist and helps activate the ingredients.
- 1/3 cup vegetable oil: Enhances moisture, resulting in a rich cake.
- 3 large eggs: Acts as a binder and adds richness.
- 1 cup creamy peanut butter: Use your favorite brand for a creamier texture—chunky works too for added crunch!
- 1 can sweetened condensed milk: Introduces an irresistible sweetness and smoothness.
- 2 cups whipped topping: Brings lightness and creaminess to balance the overall richness.
- 1 cup chocolate fudge sauce: Choose your favorite for that indulgent chocolate burst.
- 3 Butterfinger candy bars, crushed: They add that signature crunch and nostalgic flavor.
When you gather your ingredients, consider swapping the yellow cake mix with a chocolate or even a gluten-free option, if needed. The key is to retain the moisture and texture that makes this cake unforgettable.
How to Make Butterfinger Candy Bar Poke Cake
Step 1: Preheat and Prepare
Preheat your oven according to the instructions on your cake mix box. Grease and flour a 9×13 inch baking pan for effortless removal later.
Step 2: Mix Your Ingredients
In a large mixing bowl, combine the yellow cake mix with 1 cup of water, 1/3 cup vegetable oil, and 3 large eggs. Whisk until the batter is smooth and homogenous.
Step 3: Time to Bake
Pour the batter into the prepared baking pan. Place it in the oven and bake according to the package instructions, checking for doneness with a toothpick. It should come out clean once baked.
Step 4: Cool Down
Once your cake is golden and baked through, let it cool for about 10 minutes. This brief cooling period allows for the perfect absorption of flavors.
Step 5: Poke and Pour
Using the end of a wooden spoon, poke holes all over the surface of the warm cake. Aim for spacing them out evenly to maximize the peanut butter drizzle.
Step 6: Create the Filling
In a separate bowl, blend 1 cup of peanut butter with 1 can of sweetened condensed milk until it reaches a smooth, creamy consistency.
Step 7: Soak It In
Drizzle this decadent peanut butter mixture over the warm cake. Ensure that it seeps into every poked hole, infusing the cake with rich peanut butter goodness.
Step 8: Top It Off
Spread the 2 cups of whipped topping over the cake, creating a velvety layer.
Step 9: Add the Goodies
Drizzle the chocolate fudge sauce generously over the whipped topping. Finally, sprinkle the crushed Butterfinger candy bars generously across the surface for that irresistible crunch.
Step 10: Chill Before Serving
Refrigerate the cake for at least 2 hours. This allows all the flavors to meld beautifully, creating the ultimate dessert to enjoy!
Chef’s Notes & Helpful Tips
- Make-Ahead Tips: This cake is perfect for batch preparation! Make it a day ahead for the flavors to intensify before serving.
- Cooking Alternatives: Swap the traditional oven for an air fryer—just adjust the cooking time for quicker results.
- Customization Ideas: Want to switch it up? Try integrating different flavors of pudding, fruit, or other candies for a unique twist.
Common Mistakes to Avoid
Avoid rushing the cooling process. Baking a cake can be delicate, and cutting corners can lead to a soggy bottom. Ensure you let it cool adequately before poking holes or adding toppings. Also, be cautious not to overmix your batter when preparing it. Overmixing can lead to a dense texture rather than the lightness you expect.
What to Serve With Butterfinger Candy Bar Poke Cake
Elevate your dessert table with some delightful pairings:
- Coffee: A warm cup enhances the cake’s flavors, creating a cozy experience.
- Vanilla Ice Cream: The cold creaminess complements the chocolate and peanut butter perfectly.
- Milkshakes: A rich chocolate or peanut butter milkshake pairs beautifully and satisfyingly.
- Fresh Fruit: Berries or sliced bananas bring a refreshing contrast, balancing the sweetness.
- Chocolate Sauce Drizzle: For true chocoholics, an extra drizzle elevates the dessert to new heights.
- Whipped Cream: A dollop on the side adds an extra lightness.
- Caramel Sauce: Swirl it into your plate for an indulgent surprise.
Storage & Reheating Instructions
Store any leftover cake in an airtight container in the fridge for up to 3–5 days, allowing you to savor those flavors again. If you need to freeze it, wrap individual slices in plastic wrap and then place them in a freezer bag, ensuring they’re well-sealed to avoid frostbite. When ready to enjoy another slice, thaw it in the fridge overnight and enjoy right out of the refrigerator for a refreshing treat.
Estimated Nutrition Information
Approximate values per slice (based on 12 servings):
- Calories: 350
- Fat: 20g
- Carbohydrates: 40g
- Protein: 6g
Please note that these values can vary based on the specific ingredients used.
FAQs
Can I use a different cake mix?
Absolutely! A chocolate cake mix can intensify the cocoa flavors, creating a rich experience, while a gluten-free cake mix is perfect for those with dietary restrictions.
Can I replace peanut butter with another nut butter?
Sure! Almond butter or cashew butter can create a different flavor profile while providing a similar creamy texture.
How long can I keep leftovers?
If stored properly, leftovers should remain fresh for 3–5 days in the refrigerator. It can also last in the freezer for up to 3 months.
Can I make it without the whipped topping?
Yes, you can substitute it with homemade whipped cream or even a non-dairy topping to suit dietary preferences.
Can I use a different candy bar for the topping?
Certainly! Feel free to experiment with other candy bars like Snickers or Reese’s for a fun twist on flavor.
Conclusion
As you step into the magical world of baking this Butterfinger Candy Bar Poke Cake, let your heart race with excitement for the flavors and memories it will evoke. With every delightful layer, you create not just a dessert, but a gathering of love, laughter, and joy. This cake invites you to savor each bite, bringing warmth to your kitchen and smiles to your loved ones’ faces. Dive into this candy-coated adventure and watch it vanish slice by slice— because once you start, stopping is truly not an option! Embrace the joy of baking and make this scrumptious cake your own today. You won’t regret it!
Print
Butterfinger Candy Bar Poke Cake
- Prep Time: 20 minutes
- Cook Time: 30 minutes
- Total Time: 50 minutes
- Yield: 12 servings 1x
- Category: Dessert
- Method: Baking
- Cuisine: American
- Diet: Vegetarian
Description
A delightful poke cake that combines creamy peanut butter, chocolate fudge sauce, and crunchy Butterfinger pieces for an unforgettable dessert experience.
Ingredients
- 1 box yellow cake mix
- 1 cup water
- 1/3 cup vegetable oil
- 3 large eggs
- 1 cup creamy peanut butter
- 1 can sweetened condensed milk
- 2 cups whipped topping
- 1 cup chocolate fudge sauce
- 3 Butterfinger candy bars, crushed
Instructions
- Preheat your oven according to the instructions on your cake mix box.
- Grease and flour a 9×13 inch baking pan.
- In a large mixing bowl, combine the cake mix, water, vegetable oil, and eggs. Whisk until smooth.
- Pour the batter into the prepared baking pan.
- Bake according to the package instructions, checking for doneness with a toothpick.
- Let the cake cool for about 10 minutes.
- Poke holes all over the surface of the warm cake with the end of a wooden spoon.
- Blend peanut butter with sweetened condensed milk until smooth.
- Drizzle the peanut butter mixture over the cake, ensuring it seeps into the holes.
- Spread whipped topping over the cake.
- Drizzle chocolate fudge sauce over the whipped topping.
- Sprinkle crushed Butterfinger bars on top.
- Refrigerate for at least 2 hours before serving.
Notes
This cake is perfect for batch preparation! Consider making it a day ahead for intensified flavors.
Nutrition
- Serving Size: 1 slice
- Calories: 350
- Sugar: 28g
- Sodium: 200mg
- Fat: 20g
- Saturated Fat: 6g
- Unsaturated Fat: 12g
- Trans Fat: 0g
- Carbohydrates: 40g
- Fiber: 1g
- Protein: 6g
- Cholesterol: 40mg


")