Introduction to Gluten Free Perogies Recipe
Welcome to my kitchen, where I’m excited to share a delightful Gluten Free Perogies Recipe that’s sure to become a family favorite! As a busy mom, I know how challenging it can be to whip up meals that please everyone. These perogies are not only easy to make but also a comforting dish that brings smiles to the dinner table. Whether you’re looking for a quick solution for a hectic weeknight or a dish to impress your loved ones, this recipe is your ticket to culinary success. Let’s dive in!
Why You’ll Love This Gluten Free Perogies Recipe
This Gluten Free Perogies Recipe is a game-changer for busy families! It’s quick, taking just 45 minutes from start to finish, making it perfect for those hectic evenings. The taste? Absolutely divine! Each bite is a warm hug, filled with creamy potatoes and optional cheese. Plus, you can customize the filling to suit your family’s preferences. Trust me, once you try these, they’ll be a regular on your dinner rotation!
Ingredients for Gluten Free Perogies Recipe
Gathering the right ingredients is the first step to creating your delicious Gluten Free Perogies Recipe. Here’s what you’ll need:
- Gluten-free flour: This is the base of your dough. Look for a blend that includes xanthan gum for better texture.
- Salt: Just a pinch enhances the flavor of the dough, making each bite more enjoyable.
- Large egg: This binds the ingredients together, giving the dough a nice structure.
- Water: Essential for bringing the dough together. Use warm water for a softer texture.
- Mashed potatoes: The heart of the filling! You can use leftovers or make fresh ones for a creamy center.
- Cheese (optional): Adds a rich, savory flavor. Feel free to use your favorite type, like cheddar or mozzarella.
- Olive oil: Used for sautéing the perogies to a golden perfection. You can substitute with butter for a richer taste.
For exact measurements, check the bottom of the article where you can find everything listed for easy printing. Happy cooking!
How to Make Gluten Free Perogies Recipe
Step 1: Prepare the Dough
Let’s kick things off by preparing the dough for our Gluten Free Perogies Recipe. In a large bowl, mix the gluten-free flour and salt together. This simple step is crucial for flavor. Next, crack in the large egg and pour in the warm water. Now, it’s time to get your hands in there! Knead the mixture until a smooth dough forms. It should feel soft but not sticky. If it’s too dry, add a splash more water. This dough is the foundation of your delicious perogies!
Step 2: Roll Out the Dough
Once your dough is ready, it’s time to roll it out. Dust your work surface with a bit of gluten-free flour to prevent sticking. Take a portion of the dough and roll it out to about 1/8 inch thick. You want it thin enough to be pliable but thick enough to hold the filling. Using a round cutter or a glass, cut out circles from the dough. Each circle should be about 3 inches in diameter. Gather any scraps, re-roll, and cut more circles. This is where the fun begins!
Step 3: Make the Filling
Now, let’s whip up the filling for our perogies. In a separate bowl, combine the creamy mashed potatoes with the optional cheese. If you’re using leftovers, make sure they’re well-mashed and smooth. Mix until everything is evenly combined. The cheese adds a delightful richness, but feel free to skip it if you prefer a lighter filling. This mixture is the heart of your perogies, so make sure it’s tasty! A little taste test never hurt anyone!
Step 4: Assemble the Perogies
With your dough circles and filling ready, it’s time to assemble the perogies. Take one dough circle and place a spoonful of the potato mixture in the center. Be careful not to overfill, or they might burst while cooking! Fold the dough over to create a half-moon shape. Press the edges together firmly to seal them. You can crimp the edges with a fork for a decorative touch. Repeat this process until all your dough and filling are used up. It’s like a little assembly line!
Step 5: Cook the Perogies
Now for the exciting part—cooking the perogies! Bring a large pot of salted water to a boil. Once boiling, gently drop in the perogies, being careful not to overcrowd the pot. Cook them until they float to the surface, which usually takes about 3-5 minutes. This floating trick is a great indicator that they’re ready! Use a slotted spoon to remove them from the water and let them drain. They’re almost ready to eat!
Step 6: Sauté for Flavor
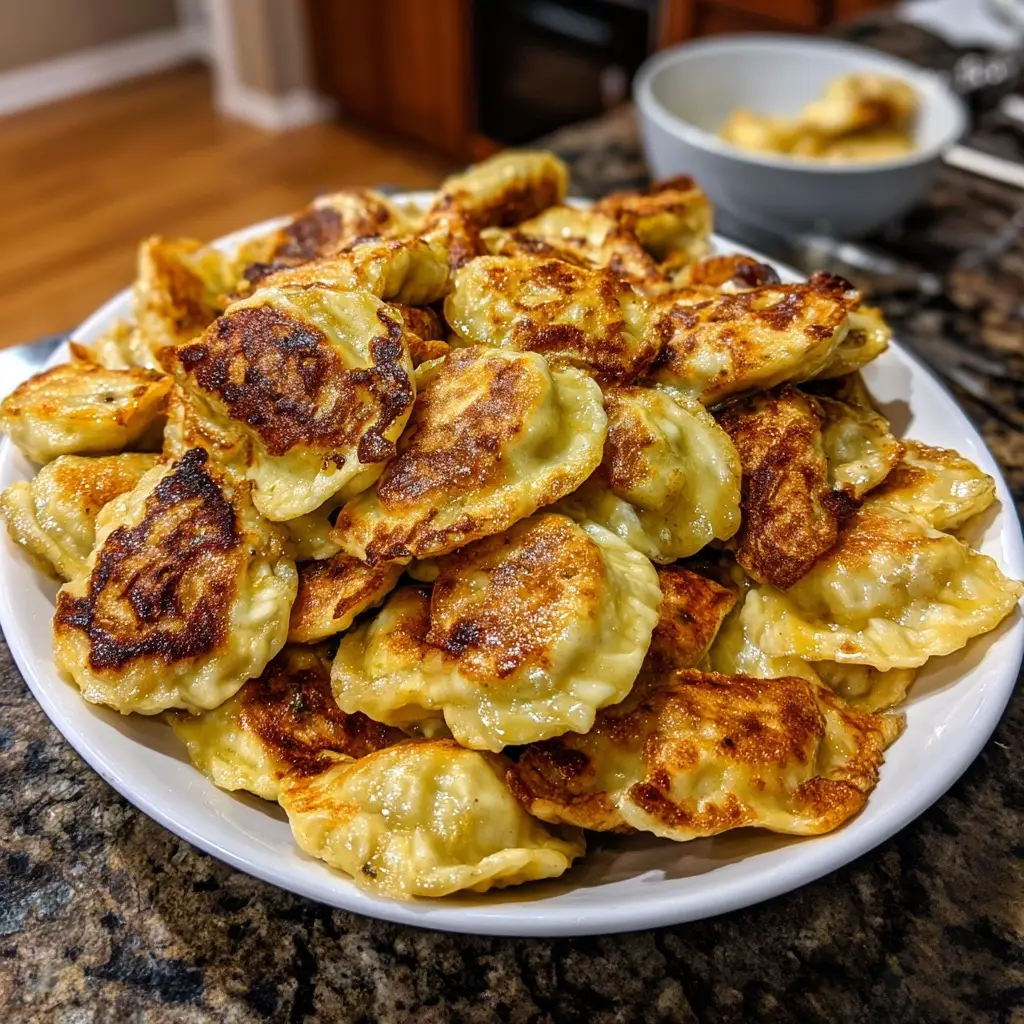
To add a delicious golden touch, let’s sauté the cooked perogies. Heat a tablespoon of olive oil in a large skillet over medium heat. Once hot, add the boiled perogies in a single layer. Sauté them for about 3-4 minutes on each side until they’re beautifully golden brown and crispy. This step adds a wonderful texture and flavor. Trust me, your family will be begging for seconds after they see these golden beauties!
Tips for Success
- Use a gluten-free flour blend with xanthan gum for the best texture.
- Keep your dough covered with a damp cloth to prevent it from drying out.
- Don’t overcrowd the pot when boiling; cook in batches for even results.
- Experiment with different fillings like sauerkraut or mushrooms for variety.
- Serve with sour cream or your favorite dipping sauce for extra flavor!
Equipment Needed
- Mixing bowl: A large bowl for combining ingredients. A sturdy plastic or glass bowl works well.
- Rolling pin: Essential for rolling out the dough. A wine bottle can be a fun alternative!
- Round cutter: Use a cookie cutter or glass to cut dough circles.
- Slotted spoon: Perfect for removing perogies from boiling water.
- Skillet: A non-stick skillet is ideal for sautéing the perogies.
Variations
- Sweet Potato Filling: Swap out regular mashed potatoes for sweet potatoes for a slightly sweeter and healthier twist.
- Vegetarian Option: Add sautéed spinach, mushrooms, or roasted vegetables to the filling for a colorful and nutritious variation.
- Herbed Dough: Mix in fresh herbs like dill or parsley into the dough for an aromatic flavor boost.
- Cheese Lovers: Experiment with different cheeses like feta, goat cheese, or even a spicy pepper jack for a kick!
- Gluten-Free Vegan: Replace the egg with a flaxseed egg and use dairy-free cheese for a vegan-friendly version.
Serving Suggestions
- Pair your perogies with a dollop of sour cream or Greek yogurt for a creamy contrast.
- Serve alongside a fresh garden salad for a light and refreshing meal.
- Complement with sautéed onions or crispy bacon for added flavor.
- Enjoy with a glass of chilled white wine or sparkling water for a delightful dining experience.
FAQs about Gluten Free Perogies Recipe
As you embark on your culinary adventure with this Gluten Free Perogies Recipe, you might have a few questions. Here are some common queries I’ve encountered, along with helpful answers to guide you along the way!
Can I freeze the perogies before cooking them?
Absolutely! You can freeze the assembled perogies before boiling. Just lay them out on a baking sheet in a single layer until frozen, then transfer them to a freezer bag. When you’re ready to cook, boil them straight from the freezer—no need to thaw!
What can I use instead of gluten-free flour?
If you don’t have gluten-free flour on hand, you can try using almond flour or a homemade blend of rice flour and tapioca starch. Just keep in mind that the texture may vary slightly.
How do I know when the perogies are cooked?
When the perogies float to the surface of the boiling water, they’re ready! This usually takes about 3-5 minutes. It’s like a little dance party in the pot, signaling that they’re done!
Can I make the dough ahead of time?
Yes, you can prepare the dough in advance! Just wrap it tightly in plastic wrap and store it in the fridge for up to 24 hours. When you’re ready to use it, let it sit at room temperature for a bit before rolling it out.
What are some good dipping sauces for perogies?
For a delicious twist, try serving your perogies with sour cream, Greek yogurt, or even a tangy mustard sauce. You can also drizzle them with a bit of melted butter and sprinkle fresh herbs for extra flavor!
Final Thoughts
Making this Gluten Free Perogies Recipe is more than just cooking; it’s about creating memories in the kitchen. The joy of rolling out dough, filling each perogie, and watching them float to the surface is a delightful experience. It’s a dish that brings family together, sparking laughter and conversation around the table. Plus, the satisfaction of serving a homemade meal that everyone loves is truly rewarding. So, gather your loved ones, roll up your sleeves, and enjoy the deliciousness of these perogies. Trust me, they’ll become a cherished tradition in your home!
Print
Gluten Free Perogies Recipe You’ll Love to Make Today!
- Prep Time: 30 minutes
- Cook Time: 15 minutes
- Total Time: 45 minutes
- Yield: 4 servings 1x
- Category: Main Dish
- Method: Boiling and Sautéing
- Cuisine: Eastern European
- Diet: Gluten Free
Description
A delicious and easy-to-make gluten-free perogies recipe that everyone will love.
Ingredients
- 2 cups gluten-free flour
- 1/2 teaspoon salt
- 1 large egg
- 1/2 cup water
- 1 cup mashed potatoes
- 1/2 cup cheese (optional)
- 1 tablespoon olive oil
Instructions
- In a bowl, mix gluten-free flour and salt.
- Add the egg and water, and knead until a dough forms.
- Roll out the dough on a floured surface and cut into circles.
- In another bowl, combine mashed potatoes and cheese.
- Place a spoonful of the filling on each dough circle and fold over, sealing the edges.
- Boil water in a pot and cook the perogies until they float.
- Heat olive oil in a pan and sauté the cooked perogies until golden brown.
Notes
- Ensure all ingredients are gluten-free.
- Feel free to customize the filling with your favorite ingredients.
- Store leftovers in an airtight container in the fridge.
Nutrition
- Serving Size: 1 serving
- Calories: 250
- Sugar: 1g
- Sodium: 200mg
- Fat: 10g
- Saturated Fat: 3g
- Unsaturated Fat: 5g
- Trans Fat: 0g
- Carbohydrates: 35g
- Fiber: 3g
- Protein: 6g
- Cholesterol: 50mg


")